North Cascades NP (Diablo Lake, Ross Lake), Washington
3-Day Itinerary for Solo Traveler
“Turquoise Water, Thin Air: 3 Days Alone in the North Cascades”
Glacial melt paints Diablo Lake an impossible turquoise, wildflowers are just waking up on the high meadows, and the crowds haven't arrived yet. This is a park that rewards solitude — three days moving from easy overlooks to thin-air passes, with plenty of quiet in between for a traveler who came here to think.
At a Glance
Highlights
- Diablo Lake's unreal turquoise glow at golden hour
- Standing alone at Ross Lake Overlook before the first tour van arrives
- Earning sweeping views on the Maple Pass Loop's wildflower switchbacks
- Cresting Cascade Pass where three mountain ranges converge
- Watching alpenglow hit granite at Washington Pass
- Old-growth silence on the Skykomish River Trail
- The particular satisfaction of eating a packed lunch with your legs dangling over a granite ledge
Day-by-Day Plan
Day 1: Arrival & First Light on the Water
A gentle first day of short, accessible overlooks along the Diablo Lake Corridor — about 1 mile of easy walking total, low physical exertion, built for settling into the altitude and the silence.
Arrive by 8am and the overlook is nearly silent — no engines, no chatter, just the raven calls and the low hum of the dam somewhere below. The water is a turquoise so vivid it looks digitally altered, glacial sediment suspended in the current. Give yourself time to just stand at the railing; this is the moment the whole trip announces itself.
A short drive east and the highway opens onto another jaw-dropping turquoise expanse, this one framed tighter by dense conifer. It's quieter than Diablo — fewer people seem to make the extra stop — which makes it a good spot for a solo traveler wanting a few minutes of total stillness before the day's momentum builds.

The day starts slow and quiet by design — an early arrival at Diablo Lake Overlook rewards you with a nearly empty platform and that first unbelievable look at turquoise water against granite peaks. There's no rush here; this is the moment to simply acclimate to the scale of the place.
A short, easy drive brings you to Ross Lake Overlook, a quieter cousin to Diablo with denser forest framing the water. With no major hike planned today, the afternoon is open for a slow lunch — pack something from Concrete or Marblemount before heading in, since services disappear once you're past the gateway towns — and simply absorbing the surroundings, maybe with a paperback or journal at one of the pullouts.
With no dining venues mapped directly in the park, plan to have picked up dinner supplies in Concrete or Marblemount before driving in. Spend the last daylight hours back at Diablo Lake Overlook if the light is good — sunset often brings a second wave of color to the water, and by early evening, most day-trippers have cleared out, leaving the overlook peaceful again before you settle in for the night.
Day 2: Into the High Country — Cascade Pass
The most physically demanding day of the trip — a full-day alpine hike up to Cascade Pass, roughly 7-9 miles round trip with significant elevation gain, intense energy output balanced by some of the best views in the park.
Start early — by 7am the trailhead lot is still mostly empty and the air is sharp with cold. The climb switchbacks through forest before opening onto exposed alpine terrain, and the payoff at the 5,400-foot summit is total: three mountain ranges converge in every direction, the tree line falls away behind you, and the silence up there is enormous. For a solo hiker, this is a trail where you'll pass just enough other hikers to feel safe without ever feeling crowded — a good rhythm for conversation if you want it, or total solitude if you don't.

Before sunrise properly breaks, you're on the road to the Cascade Pass trailhead, arriving early enough to claim a quiet parking spot and start climbing while the air is still cold and sharp. The trail winds up through forest, the grade steady and demanding, until the trees fall away and the full alpine bowl opens around you — granite, ice, and impossible distance in every direction.
Reaching the pass by late morning gives you time to rest, eat a packed lunch with your legs over the edge of the world, and take in the 360-degree views before the early-afternoon window when mountain weather tends to turn. Begin the descent by early-to-mid afternoon to stay ahead of any building clouds, giving your legs and knees the switchbacks back down at an easier pace than the climb up.
By evening, exhaustion is the honest, earned kind. There's no dining data mapped near the trailhead, so plan on having packed dinner supplies from Concrete or Marblemount, or a simple meal back at your lodging. This is a night for an early bed — legs up, boots off, and the deep, dreamless sleep that only a full alpine day delivers.
Day 3: Wildflowers, Ridgelines, and the Long Eastern View
A moderately intense final day combining the Maple Pass Loop's wildflower-lined ridgeline (about 7.4 miles) with an easy scenic stop at Washington Pass for sweeping views before departure.
Arrive before 8am and you'll have long stretches of the switchbacks entirely to yourself — a rare gift on a loop this popular by midday. Wildflowers are just starting their bloom this time of year, dotting the meadows in early color, and the turquoise lake views from Heather Pass rival anything else in the park. It's a physically demanding loop, but the payoff of near-total solitude at sunrise-adjacent hours makes the early alarm worth it for a solo traveler.

After the intensity of the morning hike, this stop is deliberately easy — a short walk to a stone-railed overlook at 5,477 feet where the highway itself becomes the theater. The drop below to Diablo Lake is dizzying, granite walls rise like weathered bone on either side, and the wind funneling through the pass has a constant, almost electric hum. It's a good final stop before heading back west, offering scale and drama without demanding another climb from tired legs.
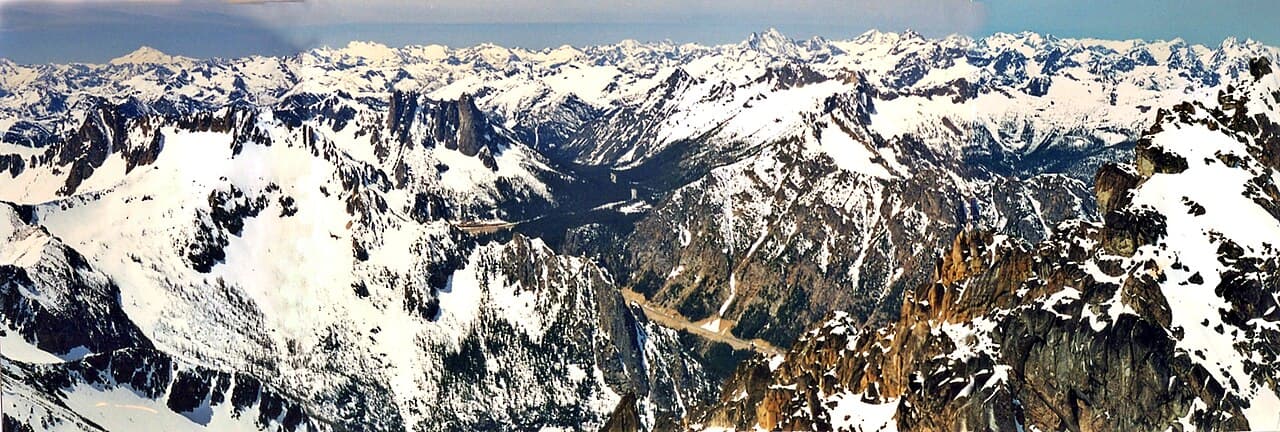
The alarm goes off early again, but this is the kind of morning that makes early alarms worth it — empty switchbacks, cool air, and wildflowers just beginning to open across the high meadows of the Maple Pass Loop. The climb is steady and long, but the turquoise lake views from Heather Pass arrive like a reward earned one switchback at a time.
After descending, the mood shifts entirely at Washington Pass — no more climbing, just a short walk to a railing and a view that somehow still manages to feel enormous. This is a good spot to let the trip settle, eat a final packed lunch with the wind in your ears, and take in the eastern gateway to the range before starting the drive back.
With the drive back toward Concrete, Marblemount, or Sedro-Woolley ahead, evening becomes about transition rather than another stop — pick up dinner in one of the gateway towns, since no dining options are mapped directly at Washington Pass, and let the last light on the peaks in your rearview mirror serve as a proper goodbye to three days spent mostly in your own good company.
Want to tweak this trip?
Our AI planner can customize this itinerary to your exact dates, interests, and travel style.
Customize This ItineraryRestaurant and food service details change frequently, and this remote region has very limited mapped dining options — always confirm current availability in Concrete, Marblemount, or Sedro-Woolley before relying on them, and pack backup food regardless.
Dietary compatibility tags are general guidance. If you have severe allergies, confirm directly with any restaurant or store before purchasing food.
Travel tips are general guidance, not professional safety advice. Check current park conditions, trail closures, and weather advisories before any hike, and inform someone of your planned route and return time.
All prices are approximate estimates and may vary seasonally, especially given the limited services available in this remote park region.
Attractions in This Itinerary
More Itineraries for North Cascades NP (Diablo Lake, Ross Lake)
Explore Washington