2 DaysCouples7 Stops

Nine Mile Canyon (near Price), Utah

2-Day Itinerary for Couples

Stone Stories: Two Days Among the Petroglyphs of Nine Mile Canyon

Stone Stories: Two Days Among the Petroglyphs of Nine Mile Canyon

Forty miles of red-rock silence hold thousands of years of etched stories, and in spring the canyon wears wildflowers and soft light instead of summer's heat. This is a trip for two who want quiet more than crowds — where the loudest sound most mornings is wind moving through sagebrush, and every panel of ancient rock art feels like a secret you've been let in on.

At a Glance

Climate & Weather
Spring days run 44–66°F with a real chance of rain showers passing through quickly; mornings can be cold enough for a fleece, afternoons mild enough for short sleeves. Pack layers, a rain jacket, sturdy hiking boots, and sun protection — the canyon offers little shade.
Getting Around
A high-clearance vehicle is strongly recommended, even in spring, since recent rain can turn sections of the road slick and rutted. Plan on slow, deliberate driving — 2 to 3 hours to traverse the canyon one way — with frequent stops rather than a single long push.
Budget
Budget roughly $120–180 per day for two, covering meals in Price/Helper before or after canyon days, fuel, and no formal entrance or activity fees inside the canyon itself.
Safety
The canyon road is remote, unpaved in stretches, and cell service disappears almost entirely once you're inside — tell someone your route and expected return time. Flash flood risk rises quickly during spring storms, so check forecasts before committing to a full traverse and never linger in narrow sections if rain starts. Fuel up and pack extra water and snacks in Price before heading in; there's nothing resembling a gas station or convenience store once you're on the canyon road.
Connectivity
Expect no reliable cell signal inside the canyon; download offline maps and any reference material before leaving Price. WiFi is limited to lodging and a handful of businesses in Price and Helper.
Local Tips
Fill your tank and grab supplies in Price before 9am if you want an early canyon start — services close by 5–6pm and there's nothing comparable once you're on the canyon road. Early morning light (before 9am) is both the most flattering for photographing the panels and the quietest time to have them to yourselves. Spring wildflowers peak along the canyon floor in late April into May, adding unexpected color to the red-rock backdrop.

Highlights

  • Sunrise light on Fremont petroglyphs with no one else around
  • A slow drive through the world's longest art gallery
  • Red-rock canyon walls that swallow sound and time alike
  • Wildflowers threading through sagebrush along the canyon floor
  • An intimate, phone-free stretch of frontier road built for two
  • Golden-hour photography at Rochester Panel
  • A high-energy canyon scramble at Cottonwood Canyon

Day-by-Day Plan

Orientation & Ancient Art

Day 1: Arrival & First Light on the Canyon Floor

A gentler first day easing into the canyon's rhythm with roughly 2 miles of easy walking across two rock art stops and one moderate ruin visit, all within the Rock Art Corridor cluster.

Wear
Layered clothing — a warm base layer for cool morning air, a packable rain jacket, sturdy closed-toe hiking shoes, and a hat for exposed midday sun.
Budget
$60–90 for two, covering fuel top-off, canyon snacks, and dinner in Price.
8:00 AM - 10:00 AM
Nine Mile Canyon (rock art panels) · morning · 120 min · Nine Mile Canyon Rock Art Corridor

Arrive by 8am and the canyon still holds the night's cool hush — weathered red and tan walls rise on either side, faint humanoid figures and spiral motifs catching the low-angle light. There's a profound quiet here, broken only by wind through sagebrush and the occasional raven overhead; by mid-morning a few more vehicles will pass, but right now it's just the two of you and several thousand years of etched history.

Nine Mile Canyon (rock art panels)
Euler, Robert C Green, Dee F / wikimedia (Public domain)
Photograph the canyon mouth approach (mile 8–10) in the first hour of light, when the walls glow amber and shadows carve out the petroglyphs' depth.
Terrain is uneven and unpaved throughout; not suited to wheelchairs or those with significant mobility limitations.
20 min driveA slow, winding stretch of canyon road — red rock rushing past the windows, no cell signal, just the two of you and the road.
10:20 AM - 11:05 AM
Pregnant Sheep Panel · midday · 45 min · Nine Mile Canyon Rock Art Corridor

A short drive deeper into the corridor brings you to this intimate, weathered panel — ochre and rust stone underfoot, the carved figures close enough to study without ever touching. It's a quieter, more contemplative stop than the main corridor, ideal for lingering side by side and tracing the centuries with your eyes alone.
Pregnant Sheep Panel
Marshall, F. R. Spencer, D. A. Millin, R. B. / wikimedia (Public domain)
Shoot the panel face-on at mid-distance for scale and detail; avoid harsh midday glare by angling slightly into the canyon's shade.
Uneven, unpaved footing; not recommended without solid mobility.
25 min driveThe road narrows and roughens here — a good excuse to slow down, roll the windows down, and take in the canyon's changing light.
12:30 PM - 2:00 PM
Fort Bottom Ruins · afternoon · 90 min · Nine Mile Canyon Rock Art Corridor

Stone granaries rise amber against a deep blue sky, and far below, the distant murmur of the Green River threads through the silence. This remote stop draws almost no other visitors, so the two of you can wander the ruins at your own pace, imagining the Fremont families who once called this overlook home.
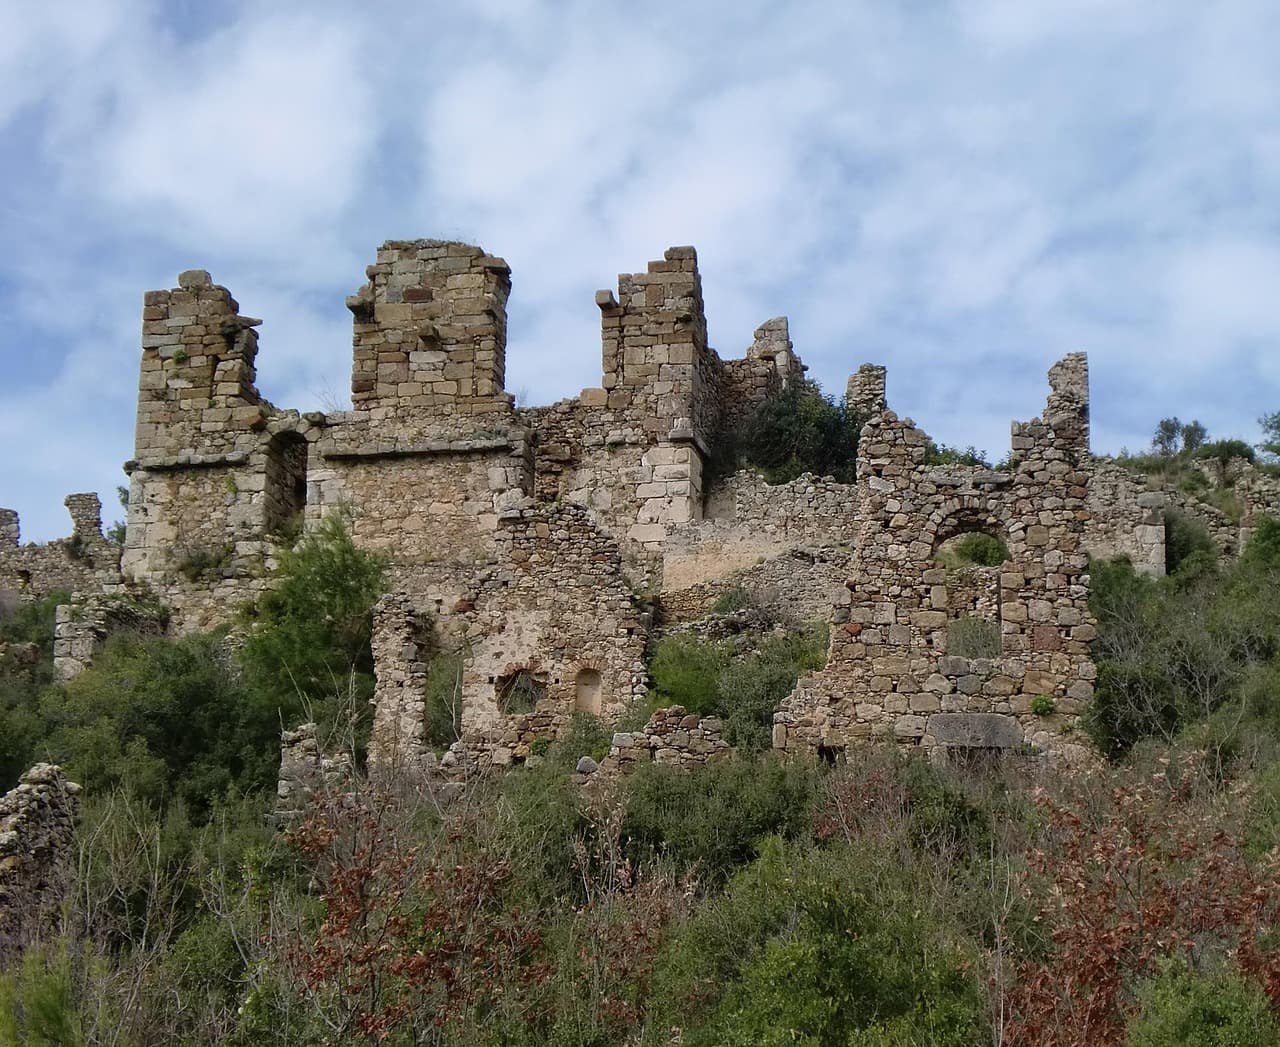
Fort Bottom Ruins
Photo by fendt1 on Pixabay
The stone granaries photograph best in early afternoon light, with the Green River overlook as a dramatic backdrop.
Rough, uneven terrain; not recommended for those with mobility concerns.
Optional detour: Rochester PanelAfter Fort Bottom Ruins and before returning to Price
A low-energy, intimate panel best suited for a relaxed late-afternoon add-on if energy allows, with excellent light for photography. Skip if: Skip if the day already feels full — Fort Bottom Ruins offers a satisfying capstone and Rochester Panel deserves its own unhurried visit on Day 2's return route.
If it rains: If rain moves in, postpone canyon travel — the unpaved road turns hazardous quickly — and shift the day toward Price's museums and galleries instead, saving the rock art corridor for clearer skies.

The canyon greets you in cool hush, red and tan walls catching the earliest light as faint petroglyphs emerge from shadow. Arriving by 8am means having this stretch of the world's longest art gallery nearly to yourselves, wind in the sagebrush the only sound.

The pace softens as you move deeper into the canyon toward Fort Bottom Ruins, stone granaries glowing amber in the early afternoon sun and the Green River whispering somewhere below. It's a slower, more contemplative stretch of the day, well-suited to wandering hand in hand through history with almost no one else around.

As afternoon light lengthens, retrace the canyon road back toward Price, windows down and red rock rushing past one last time before settling in for the evening. Plan dinner in town, where small-town hospitality and hearty regional fare await after a day spent among ancient stone.

Wild Canyon & Golden Light

Day 2: Red Rock and River Wind: Cottonwood Canyon

A moderately active second day with roughly 3 miles of walking, closing out the Rock Art Corridor with a golden-hour panel visit before shifting into the higher-energy Cottonwood Canyon for the trip's scenic centerpiece.

Wear
Breathable layers for midday warmth, a rain shell in case spring showers roll through, and grippy hiking boots for uneven canyon floor terrain.
Budget
$70–100 for two, including fuel, canyon-day snacks, and an upscale dinner in Price or Helper.
8:30 AM - 9:15 AM
Rochester Panel · morning · 45 min · Nine Mile Canyon Rock Art Corridor

Warm red sandstone holds the morning's first light, ancient hand-carved grooves catching texture and shadow as you trace them without touching. Arrive early and this intimate panel is yours alone — a quiet, low-energy start before the day's more active stretch ahead.

Rochester Panel
Photo by Alex Moliski on Pexels
Come back at late afternoon for the richest light on the panel face, though early morning offers solitude worth trading for slightly flatter light.
Uneven canyon floor; not accessible for wheelchairs.
35 min driveA steady climb out of the rock art corridor and into wilder terrain — the canyon walls seem to grow taller with every mile.
10:00 AM - 1:00 PM
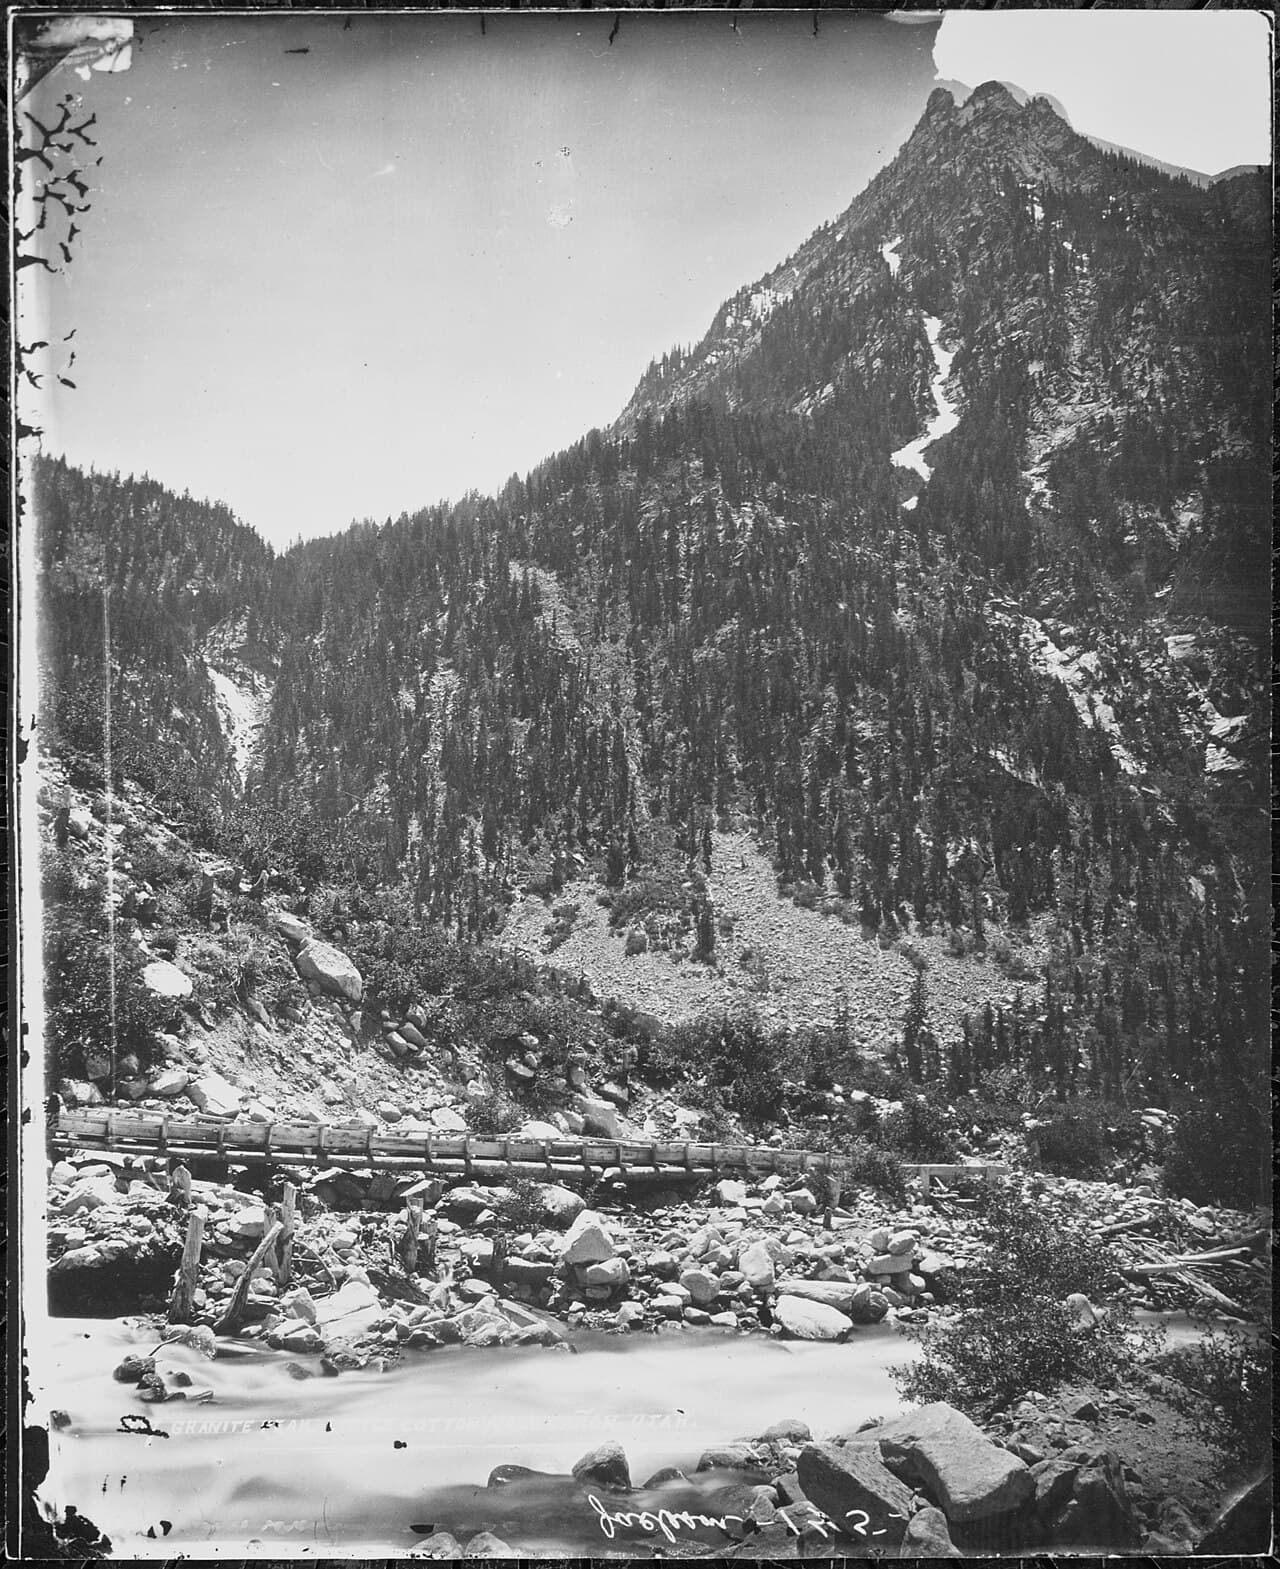
Cottonwood Canyon · midday · 180 min · Cottonwood Canyon

Red and tan stone towers overhead as the canyon narrows, cool shade settling across your shoulders while the faint rush of seasonal water sounds somewhere below. This is the trip's high-energy centerpiece — a real canyon scramble with sweeping photography rewards, best tackled with two hours of daylight and comfortable footwear.

Cottonwood Canyon
William Henry Jackson / wikimedia (Public domain)
Head for the upper canyon rim overlook where light breaks through the narrow opening — best photographed between 11am and 1pm when the sun angles directly into the gap.
Not recommended for those with mobility limitations; terrain is steep and uneven throughout.
35 min driveRetracing the canyon road in reverse, the two of you likely won't pass another vehicle the entire way.
2:00 PM - 3:30 PM
Nine Mile Canyon (rock art panels) · afternoon · 90 min · Nine Mile Canyon Rock Art Corridor

On the return drive, pause once more at the Tavaputs Plateau overlook panels for a final, lingering look — the afternoon light casts long shadows across the carvings, different from yesterday's morning glow. It's a fitting closing chapter, revisiting familiar stone with new light and a quieter mood after the exertion of Cottonwood Canyon.

Nine Mile Canyon (rock art panels)
Euler, Robert C Green, Dee F / wikimedia (Public domain)
Afternoon light favors the Tavaputs Plateau overlook panels (mile 20–22) — softer shadows reveal carving depth missed in harsher midday sun.
Unpaved, uneven terrain throughout; not suited to limited mobility.
Optional detour: Green River Overlook TrailAfter Cottonwood Canyon and before the return drive to Nine Mile Canyon
A sweeping desert vista and moderate hike that rewards with layered canyon views and a strong sunset photo opportunity if timing allows. Skip if: Skip if energy is already spent after Cottonwood Canyon's scramble, or if the day's pace is running long — this trail adds meaningful drive time and is better suited to a trip with an extra day to spare.
If it rains: If rain arrives, Cottonwood Canyon's flash flood risk makes it unsafe to enter — retreat instead to a gentler stretch of the Nine Mile Canyon drive on stable ground, or delay until skies clear, since the rock art panels themselves are weather-resistant and will wait.

Morning begins gently at Rochester Panel, warm sandstone catching first light and ancient carvings emerging from shadow in near-total silence. It's a soft opening before the day shifts into higher gear.

Energy rises through midday as Cottonwood Canyon's towering red walls close in, cool shade and the faint sound of seasonal water marking a real shift in pace and terrain. By early afternoon, the return to Nine Mile Canyon's familiar panels offers a slower, reflective close to the exploring.

As the canyon road leads back toward Price, save the evening for an upscale, intimate dinner in town or nearby Helper — a fitting splurge to mark the trip's final night, with a chance to talk over two days of ancient stone and red-rock silence.

Want to tweak this trip?

Our AI planner can customize this itinerary to your exact dates, interests, and travel style.

Customize This Itinerary
Good to Know

Restaurant details (hours, menus, availability) change frequently. Check current hours before visiting, especially in seasonal destinations.

Dietary compatibility tags are general guidance. If you have severe allergies, confirm directly with the restaurant.

Travel tips are general guidance, not professional safety advice. Check government advisories for latest information.

All prices are approximate and may vary seasonally.

We use cookies to improve your experience and analyze site usage. Essential cookies are always active. You can customize your preferences or accept all cookies. Cookie Policy