2 DaysSolo Traveler6 Stops

Nine Mile Canyon (near Price), Utah

2-Day Itinerary for Solo Traveler

Stone Stories: A Solo Journey Through Nine Mile Canyon

Stone Stories: A Solo Journey Through Nine Mile Canyon

Forty miles of red rock unfold like an open book here, every panel of stone a page written by hands gone centuries silent. This is a canyon best met alone — slow, quiet, and early, before the heat rises and the light turns flat.

At a Glance

Climate & Weather
Summer here means hot, dry days with intense sun and long daylight — expect highs in the 90s°F on the canyon floor by midday. Pack lightweight layers, a wide-brim hat, high-SPF sunscreen, at least 3 liters of water per day, and sturdy hiking boots for uneven, rocky terrain. Afternoon thunderstorms can build quickly in summer, so plan strenuous activity for early morning.
Getting Around
A high-clearance vehicle is strongly recommended for the unpaved sections of the canyon road; a standard sedan can manage the graded portions in dry conditions but struggles further in. Plan on 2-3 hours to traverse the full 40-mile corridor one way, with frequent stops. Fuel up and stock supplies in Price before heading in — there's nothing resembling a gas station or store once you're on the canyon road.
Budget
Budget roughly $40–70/day for a solo traveler — this covers casual meals in Price, a tank of gas for the canyon drive, and minimal entry costs (Nine Mile Canyon itself is free and self-guided, with no fees for the rock art sites).
Safety
You'll likely have long stretches without cell service, so tell someone your route and expected return time before entering the canyon. Carry extra fuel, water, and a paper map — a breakdown here means self-rescue, not a quick tow. Stay on designated paths near rock art panels; the ground can be loose and the cultural sites are irreplaceable. Flash floods are a real summer risk, so check weather before committing to canyon-floor routes.
Connectivity
Expect little to no cell signal once you're past the canyon mouth; download offline maps and any reference material before you leave Price. WiFi is available at lodging in Price and Helper but nonexistent in the canyon itself.
Local Tips
Start each canyon day by 7 AM to beat both the heat and the sun's harsh midday flattening of the rock art's shadow relief. Bring a printed BLM canyon guide or download the self-guided tour notes in Price, since many panels are unmarked or easy to miss without directions. If you're craving conversation, Price's small-town diners and the Helper coffee scene are where locals and fellow travelers actually talk — the canyon itself is built for solitude.

Highlights

  • Trace Fremont and Ute petroglyphs at sunrise before the canyon wakes
  • Stand beneath the ochre walls of the Pregnant Sheep Panel in golden light
  • Walk to Fort Bottom's stone granaries above the Green River
  • Hike the Green River Overlook Trail for sweeping Book Cliffs views
  • Study the intimate carvings of the Rochester Panel in late-afternoon glow
  • Explore Cottonwood Canyon's narrow, cool passages away from the crowds

Day-by-Day Plan

Arrival & ancient stone

Day 1: First Light on the Rock Art Corridor

A gentle orientation day centered on the canyon's most iconic rock art, covering roughly 2.5 miles of easy-to-moderate walking with a moderate energy level.

Wear
Lightweight breathable layers, a wide-brim hat, sturdy closed-toe hiking shoes, and sunglasses — the canyon floor offers little shade before mid-morning.
Budget
$45 (fuel top-off, packed lunch supplies from Price, casual dinner)
7:00 AM - 9:00 AM
Nine Mile Canyon (rock art panels) · morning · 120 min · Nine Mile Canyon Rock Art Corridor

Arrive at the canyon mouth as the light is still low and gold, when the panels along mile 8-10 seem to breathe with shadow and relief. Weathered red and tan walls rise around you, dotted with faint humanoid figures and spirals that Fremont and Ute hands carved centuries ago — the silence is broken only by wind through sagebrush and the occasional raven. Arrive by 7:30am and you'll likely have this stretch entirely to yourself; by mid-morning a handful of other visitors may trickle through, though this canyon rarely feels crowded even then.

Nine Mile Canyon (rock art panels)
Euler, Robert C Green, Dee F / wikimedia (Public domain)
Shoot the canyon mouth approach (mile 8-10) just after sunrise, when raking light brings out the carved relief that flattens by midday.
Terrain is uneven and unpaved; sturdy footwear is essential and this stop is not wheelchair accessible.
20 min driveA slow crawl along the graded canyon road, dust rising behind you, red walls closing in tighter with every mile.
9:20 AM - 10:05 AM
Pregnant Sheep Panel · morning · 45 min · Nine Mile Canyon Rock Art Corridor

A short, careful drive deeper into the corridor brings you to this quietly powerful panel, where ochre and rust-colored walls tower overhead and dry sage scents the air. Trace the carved figures with your eyes only — the etching is centuries old and easily damaged by touch. This is a solitary, contemplative stop, ideal for a solo traveler wanting a slower moment amid the canyon's grandeur.
Pregnant Sheep Panel
Marshall, F. R. Spencer, D. A. Millin, R. B. / wikimedia (Public domain)
Face the panel directly at mid-distance for detail and scale; golden hour light (early morning or just before sunset) brings out the carving depth best.
Uneven, rocky ground with no benches; not recommended for those with significant mobility limitations.
25 min driveThe road narrows and dips through washes — roll the windows down and let the juniper-scented air in.
11:00 AM - 12:15 PM
Rochester Panel · midday · 45 min · Nine Mile Canyon Rock Art Corridor

By late morning, the canyon has warmed considerably, but this panel offers an intimate, low-energy stop — sit with the warm red sandstone beneath your palms and study the hand-carved grooves of anthropomorphic figures up close. It's generally quiet even at midday, with only occasional small groups passing through, making it a good spot for unhurried reflection before the heat peaks.

Rochester Panel
Photo by Alex Moliski on Pexels
Late-afternoon light is technically better for this panel, but a midday visit still allows close-up detail shots of individual figures in even, shadow-free light.
A shorter, lower-energy stop suitable for accessibility-focused visitors in 15-25 minutes, though the ground remains uneven.
Optional detour: Green River Overlook TrailAfter Rochester Panel and before returning to lodging in Price
A moderate 90-minute hike rewarding you with sweeping views of the Green River bend and Book Cliffs, best tackled in the cooler evening hours. Skip if: Skip if the midday heat has already sapped your energy — this trail is unshaded and better suited to Day 2's cooler morning slot.
If it rains: If storms roll in, postpone canyon travel entirely — the road becomes hazardous and rock art viewing loses its appeal in poor light. Head instead to Price's museums and galleries for an indoor alternative until conditions clear.

The canyon greets you first in cool blue shadow, then gold as the sun clears the rim — this is the hour to be here, alone with ancient handprints and spiral motifs on walls that have outlasted empires. Moving slowly between the rock art panels and the Pregnant Sheep Panel, you'll feel the canyon's profound quiet settle into your own pace, the kind of solitude that's rare and worth protecting by arriving early.

As the sun climbs, the light flattens and the heat builds, so the pace eases into something more contemplative at the Rochester Panel — a shorter, shaded-adjacent stop that rewards close, unhurried study rather than long exploration. This is a good window to retreat toward Price for supplies, air conditioning, and a midday reset before the evening's cooler air returns.

With the worst of the day's heat behind you, consider a return to the canyon mouth or a stroll through Price for dinner and quiet reflection — this first day is intentionally light, easing you into the rhythm of a place that rewards patience over ambition. Rest well; tomorrow's Cottonwood Canyon and Fort Bottom stops ask a bit more of your legs.

Exploration & solitude

Day 2: Deep Canyon & River Views

A more active day covering roughly 4-5 miles across Fort Bottom, the Green River Overlook Trail, and Cottonwood Canyon, with moderate-to-high energy demands.

Wear
Moisture-wicking layers, broken-in hiking boots, a hat and sunglasses, and a daypack with at least 3 liters of water — today's stops involve more sustained walking on uneven terrain.
Budget
$55 (fuel, packed provisions, casual dinner in Price or Helper)
7:00 AM - 8:30 AM
Fort Bottom Ruins · morning · 90 min · Nine Mile Canyon Rock Art Corridor

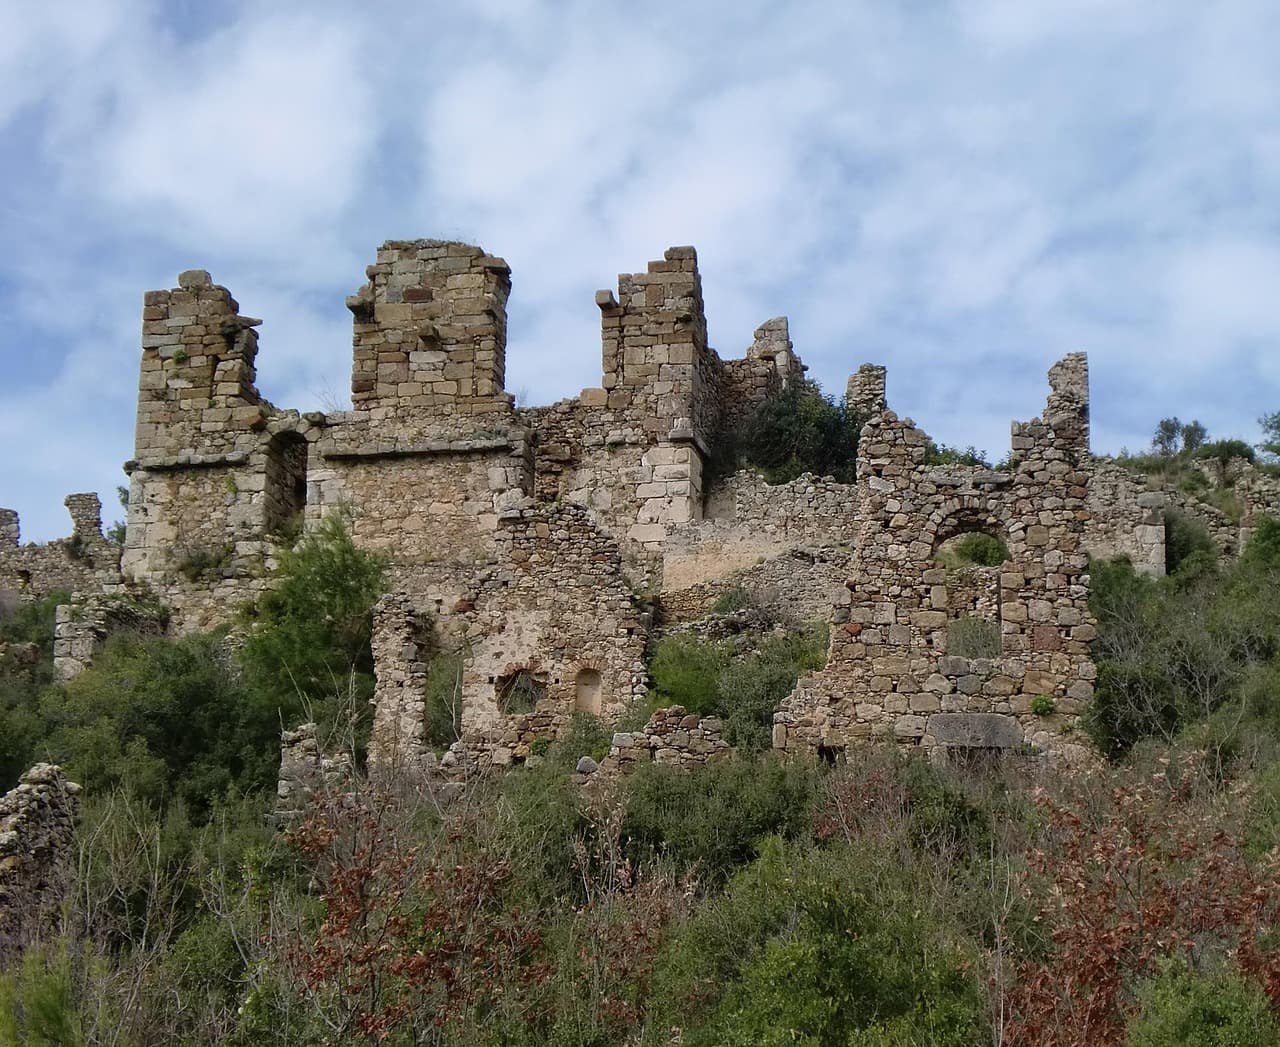
Start early while the air is still cool, following dusty sage-lined paths to weathered stone granaries glowing amber against a deep blue sky. The silence here is profound — broken only by wind through canyon walls and the faint, distant murmur of the Green River far below. This remote site sees very few visitors, so arriving at first light nearly guarantees you'll have the granaries entirely to yourself.
Fort Bottom Ruins
Photo by fendt1 on Pixabay
Shoot the stone granaries against the canyon backdrop in early morning side-light, when texture and shadow give the walls dimension.
Rough, remote terrain; not recommended without confident mobility and sturdy footwear.
15 min driveA short, bumpy connector along the canyon road, red dust settling on the windshield as the ruins recede in the mirror.
9:15 AM - 10:45 AM
Green River Overlook Trail · midday · 90 min · Nine Mile Canyon Rock Art Corridor

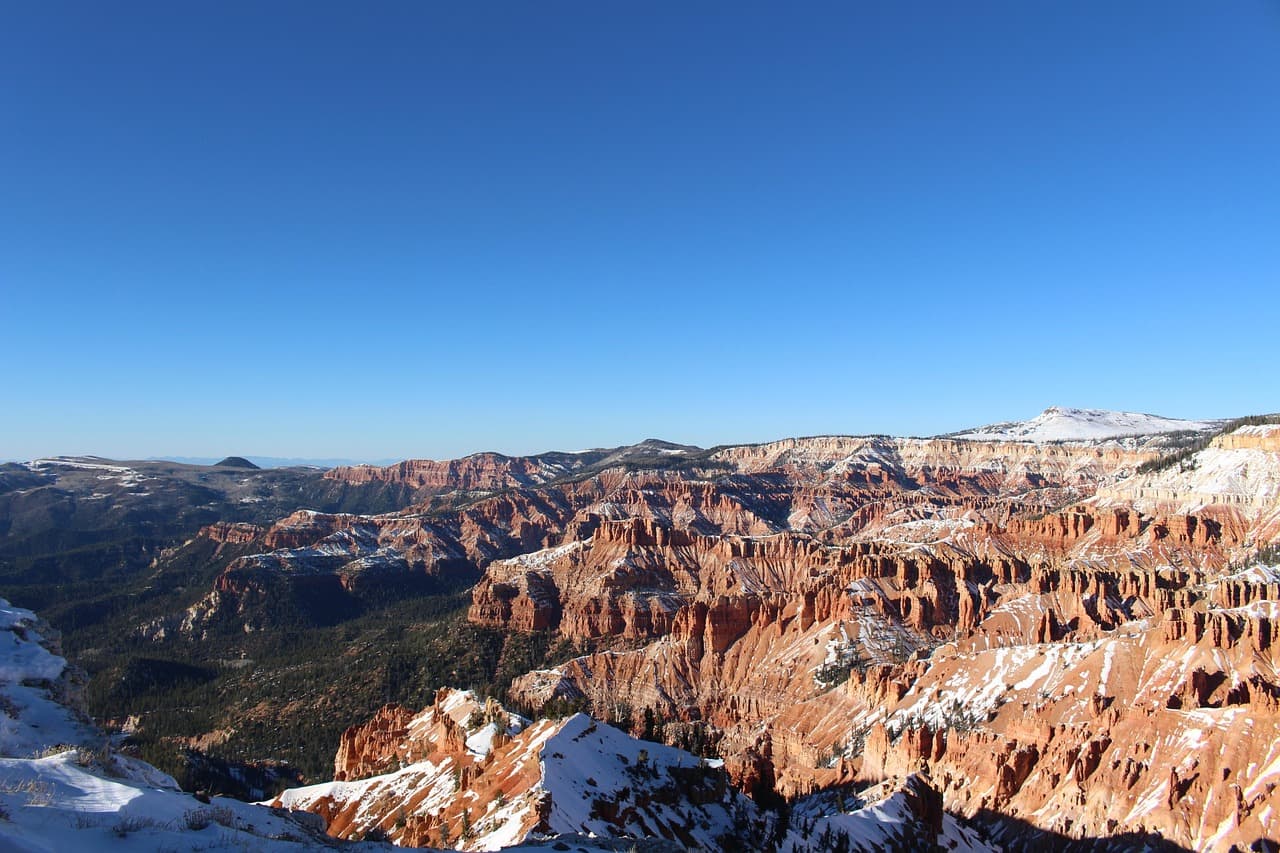
A moderate hike carries you along juniper-scented ridgelines toward sweeping desert vistas — canyon ridges stretching to the horizon and the Green River winding far below. Foot traffic is light in the morning hours, and the trail tends to fill in a bit by midday, so this window keeps you ahead of the modest crowds that do arrive during peak summer season.
Green River Overlook Trail
Photo by WeTheAstronauts on Pixabay
The main overlook platform facing south toward the Green River bend is the strongest shot; the north-facing ridgeline works well at the trail's highest point for layered canyon walls.
Not recommended for those with mobility limitations; the trail has uneven footing and no rest benches.
35 min driveA longer haul south through open canyon country, worth a pullover at any wide scenic bend to stretch and refill water before the heat of the day peaks.
1:00 PM - 4:00 PM
Cottonwood Canyon · afternoon · 180 min · Cottonwood Canyon

After a midday break to escape peak heat, head into Cottonwood Canyon's cooler, shaded passages, where red and tan stone towers overhead and the canyon narrows to wrap you in shade. The faint rush of seasonal water and scent of sage and juniper make this a rewarding final stretch — moderate weekend crowds thin out considerably by mid-to-late afternoon, especially on a weekday visit.

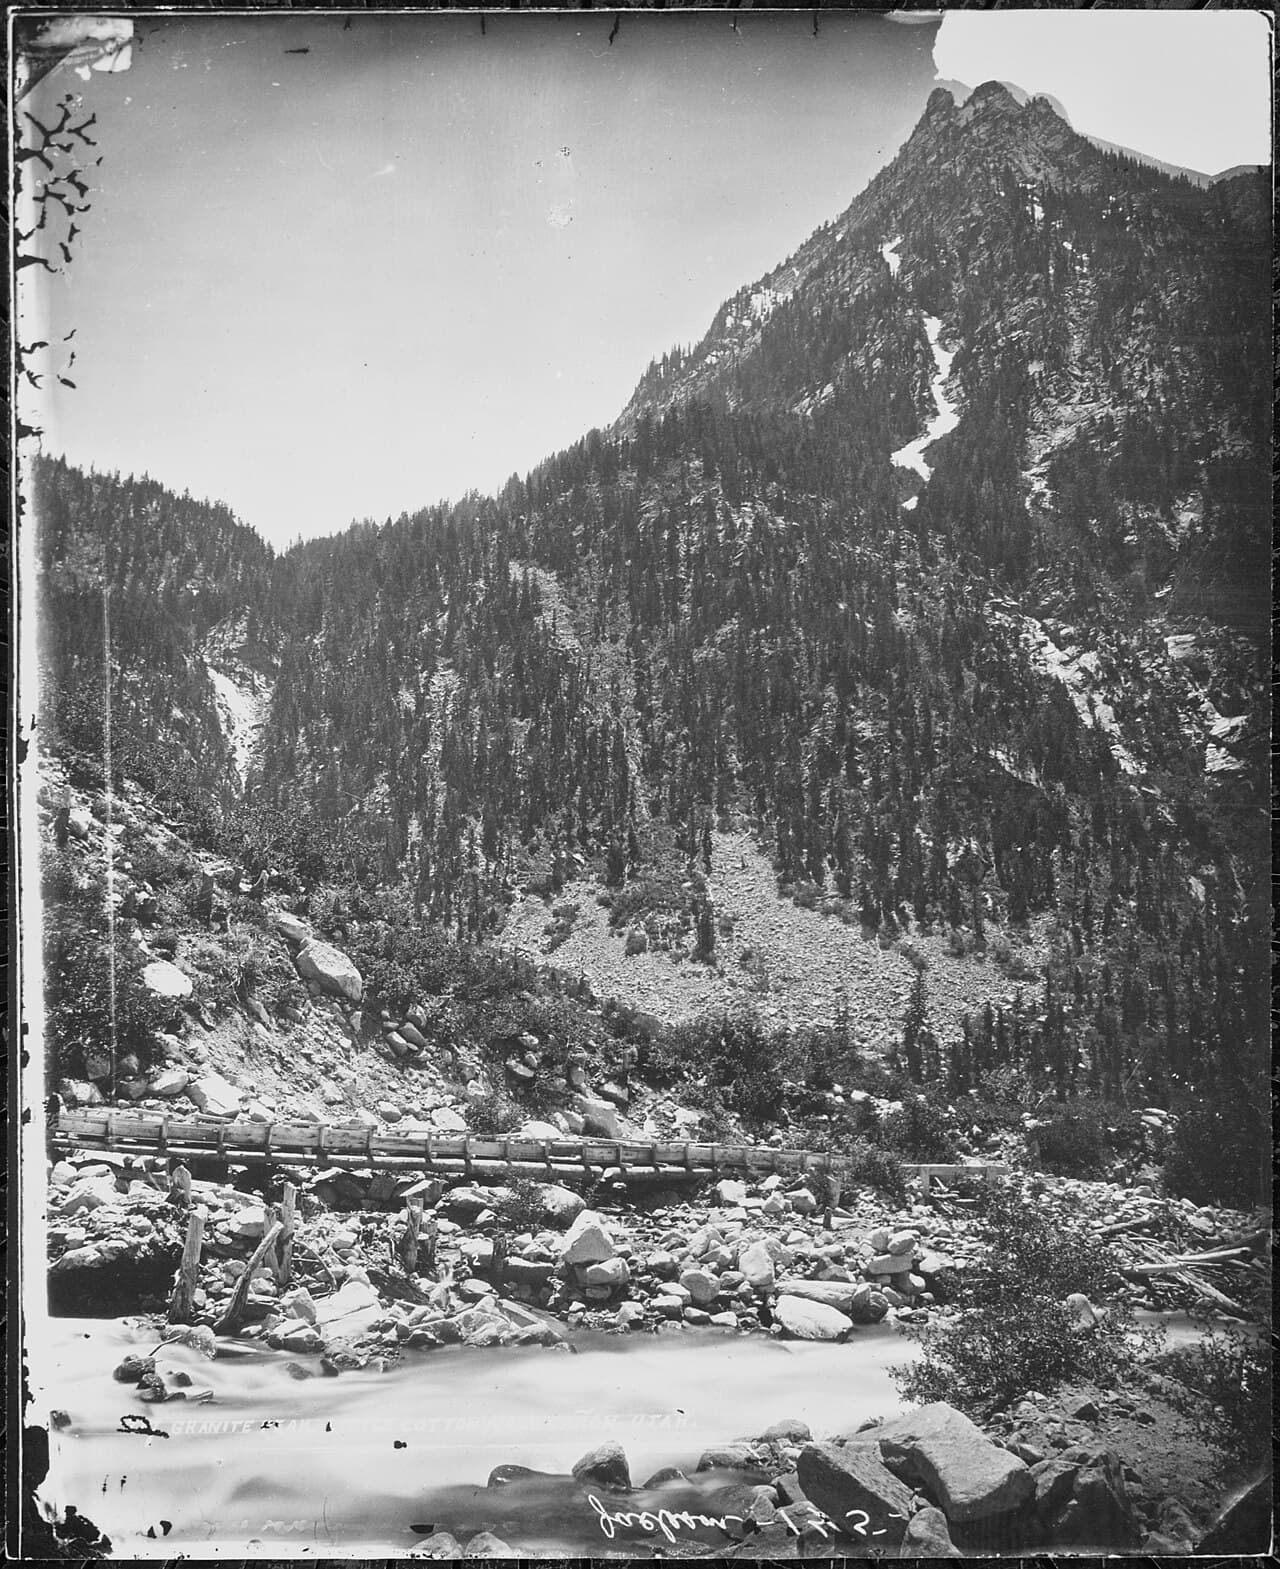
Cottonwood Canyon
William Henry Jackson / wikimedia (Public domain)
The upper canyon rim overlook, where light breaks through the narrow opening, is best photographed between 2-4pm as the sun angles into the passage.
Uneven canyon floor terrain; not recommended for those requiring flat, accessible paths.
Optional detour: Nine Mile Canyon (rock art panels)After Fort Bottom Ruins and before Green River Overlook Trail
A brief return stop lets you catch different panels in shifting morning light if you have extra time before the trailhead. Skip if: Skip if you've already covered this stop thoroughly on Day 1 and want to conserve energy for the more demanding hikes ahead.
If it rains: Cottonwood Canyon carries real flash flood risk in sudden storms — if thunderstorms are forecast, skip the canyon entirely and retreat to Nine Mile Canyon's main drive for a lower-risk scenic alternative, or head back to Price for indoor options.

The day opens at Fort Bottom Ruins in near-total solitude, stone granaries catching the day's first light while the Green River murmurs unseen below — a solo traveler's dream of quiet, unhurried discovery. From there, the Green River Overlook Trail offers a moderate stretch of the legs, rewarding the effort with layered canyon views that seem to multiply with every switchback.

Midday calls for a retreat from direct sun — pack a lunch and rest in shade or your vehicle's air conditioning before the afternoon's main event. Cottonwood Canyon's narrow, cooler passages offer welcome relief from the heat, its red-rock walls framing a slower, more immersive few hours of exploration as the crowds thin toward late afternoon.

As the light softens and the canyon shadows lengthen, make your way back toward Price or Helper for dinner and a well-earned rest — the kind of quiet, small-town evening that suits a solo traveler looking to unwind after two days of ancient stone and deep canyon silence.

Want to tweak this trip?

Our AI planner can customize this itinerary to your exact dates, interests, and travel style.

Customize This Itinerary
Good to Know

Restaurant details (hours, menus, availability) change frequently. Check current hours before visiting, especially in seasonal destinations.

Dietary compatibility tags are general guidance. If you have severe allergies, confirm directly with the restaurant.

Travel tips are general guidance, not professional safety advice. Check government advisories for latest information.

All prices are approximate and may vary seasonally.

We use cookies to improve your experience and analyze site usage. Essential cookies are always active. You can customize your preferences or accept all cookies. Cookie Policy