3 DaysCouples9 Stops

Nine Mile Canyon (near Price), Utah

3-Day Itinerary for Couples

Stone Whispers: Three Days Among Nine Mile Canyon's Ancient Walls

Stone Whispers: Three Days Among Nine Mile Canyon's Ancient Walls

Forty miles of red-rock silence hold the largest concentration of rock art in North America, etched by hands that vanished centuries ago. Spring softens the canyon with wildflowers and mild light, but the road stays rough and the crowds stay thin — perfect conditions for two people who want the desert mostly to themselves.

At a Glance

Climate & Weather
Spring days run 44–66°F with real temperature swings between morning and afternoon — pack a warm layer for early starts and a rain shell, since spring showers arrive quickly and can turn the canyon road slick within minutes. Wildflowers begin appearing along the canyon floor by late April, and shoulder-season crowds remain minimal even at midday.
Getting Around
A single vehicle works for the entire trip; a high-clearance or 4WD vehicle is strongly recommended given spring rain. Fuel up and stock water and snacks in Price before entering the canyon — there are no services once you're inside it. Budget 2–3 hours to drive the canyon's full length at a relaxed pace with stops.
Budget
Plan roughly $80–140/day per couple for food and modest activity costs — most experiences here are self-guided and free, so the budget skews toward dining, fuel, and one splurge dinner.
Safety
This is remote, self-reliant country — cell service disappears for long stretches once you're in the canyon, so tell someone your route and expected return time. Avoid entering after heavy rain; the dirt road turns to clay-like mud and flash flooding is a real risk in narrow sections. Never touch rock art panels — skin oils accelerate erosion of images that have survived a thousand years.
Connectivity
Expect little to no cell signal inside the canyon itself; Price and Helper have reliable coverage and WiFi at lodging and cafes. Download offline maps before departure and consider a paper map as backup.
Local Tips
Arrive at panels before 9am for both the best light and total solitude — by midday you may share the canyon with a handful of other cars, still nothing like a national park crowd. Fill your tank and grab picnic supplies in Price the evening before, since shops close by 5–6pm and there's nothing resembling a gas station once you're past the canyon mouth. Bring binoculars; many panels sit high on canyon walls and are easy to miss without them.

Highlights

  • Sunrise light on the Pregnant Sheep Panel with no one else around
  • A slow scenic drive through 'the world's longest art gallery'
  • Remote ruins overlooking the Green River at golden hour
  • Wildflower-lined trail with sweeping canyon vistas
  • Cottonwood Canyon's narrow, shaded walls after the crowds thin out
  • Stargazing-quality silence with near-zero light pollution
  • A splurge-worthy final evening watching the Book Cliffs catch last light

Day-by-Day Plan

Orientation and gentle immersion

Day 1: Arrival & First Light on the Canyon Floor

A lighter first day easing into the canyon's rhythm with roughly 2 miles of easy walking and moderate energy output.

Wear
Layered clothing — a warm base layer for cool morning air, a packable rain shell, sturdy closed-toe shoes with good grip for uneven rock, and a sun hat for midday.
Budget
$60–90 for two, covering fuel top-off, picnic supplies, and casual dining in Price.
8:00 AM - 10:00 AM
Nine Mile Canyon (rock art panels) · morning · 120 min · Nine Mile Canyon Rock Art Corridor

The canyon opens slowly, red and tan walls rising on either side as the road narrows and the modern world falls away. Arrive by 8am and the light is low and golden, throwing every carved figure into sharp relief against the stone — by mid-morning that clarity softens and the panels blend into shadow. Take it slow; this is a driving tour punctuated by short walks to panel clusters, ideal for a first day when legs and minds are still adjusting.

Nine Mile Canyon (rock art panels)
Euler, Robert C Green, Dee F / wikimedia (Public domain)
Photograph the canyon mouth approach (mile 8–10) with the sun still low and behind you for even, warm light on the rock face.
Terrain is uneven and unpaved; not wheelchair accessible, though many panels are visible from pullouts without significant walking.
25 min driveA slow, winding stretch of canyon road with red walls pressing close on both sides — windows down if the weather allows.
11:00 AM - 11:45 AM
Rochester Panel · midday · 45 min · Nine Mile Canyon Rock Art Corridor

A quieter, more intimate panel than the main corridor stops — this is where the Fremont artists seem most personal, with anthropomorphic figures carved close together as if in conversation. The desert silence here is almost total, broken only by wind moving through the canyon, making it a good spot for a couple to simply stand and take it in without needing to say much.

Rochester Panel
Photo by Alex Moliski on Pexels
Late-morning light is workable here, but return in late afternoon if you want the warmest tones on the sandstone.
Short walk over uneven ground from the pullout; not accessible for limited mobility.
15 min driveA short hop further down-canyon; watch for pullouts marking the panel's location, easy to miss without slowing down.
1:30 PM - 2:15 PM
Pregnant Sheep Panel · afternoon · 45 min · Nine Mile Canyon Rock Art Corridor

One of the canyon's most tender images — a carved figure whose meaning has softened rather than sharpened with time. Most visitors pass through mid-morning to early afternoon, so by 1:30pm the initial wave has cleared and you're likely to have the panel to yourselves. Trace the shapes with your eyes, not your hands, and let the silence do the rest.
Pregnant Sheep Panel
Marshall, F. R. Spencer, D. A. Millin, R. B. / wikimedia (Public domain)
Best captured at mid-distance, facing the panel directly to preserve both scale and detail.
Uneven, unpaved approach; not recommended without solid mobility.
Optional detour: Green River Overlook TrailAfter Pregnant Sheep Panel and before returning to Price
A moderate hike rewarding you with sweeping desert vistas and a good stretch of the legs after a day of shorter stops. Skip if: If energy is low on arrival day, save this trail's fuller experience for Day 2 when pacing allows more time to enjoy it properly.
If it rains: If rain moves in, postpone canyon travel — the road turns hazardous when wet — and spend the day instead exploring Price's dinosaur museums and local galleries, which pair well with a slower arrival day.

The canyon reveals itself gradually as you drive in, red walls rising and the outside world receding behind you. Arriving early means the light is low and warm, illuminating panels that will fade into flat shadow by mid-morning, and the quiet is near-total — just wind, the occasional raven, and the low hum of the engine idling at pullouts.

The pace eases further into the afternoon, with two shorter, more intimate panel stops replacing the morning's broader introduction. This is deliberately gentle: short walks, ample time to linger, and enough breathing room to adjust to the isolation and silence that define this place.

With no dining options inside the canyon itself, plan to return to Price for the evening — options there are limited compared to a larger town, so consider treating the first night simply and saving anticipation for the splurge dinner later in the trip. A quiet dinner and early rest sets up tomorrow's fuller day well.

Exploration and awe

Day 2: Deep Canyon & the Green River's Edge

The most physically demanding day of the trip, covering roughly 3.5 miles of hiking across ruins and overlook trails with moderate energy output.

Wear
Sturdy hiking boots, moisture-wicking layers, a rain shell packed just in case, plenty of water carried in a daypack, and sun protection for exposed overlook sections.
Budget
$70–100 for two, including picnic lunch supplies and a mid-range dinner in Price or Helper.
7:30 AM - 9:00 AM
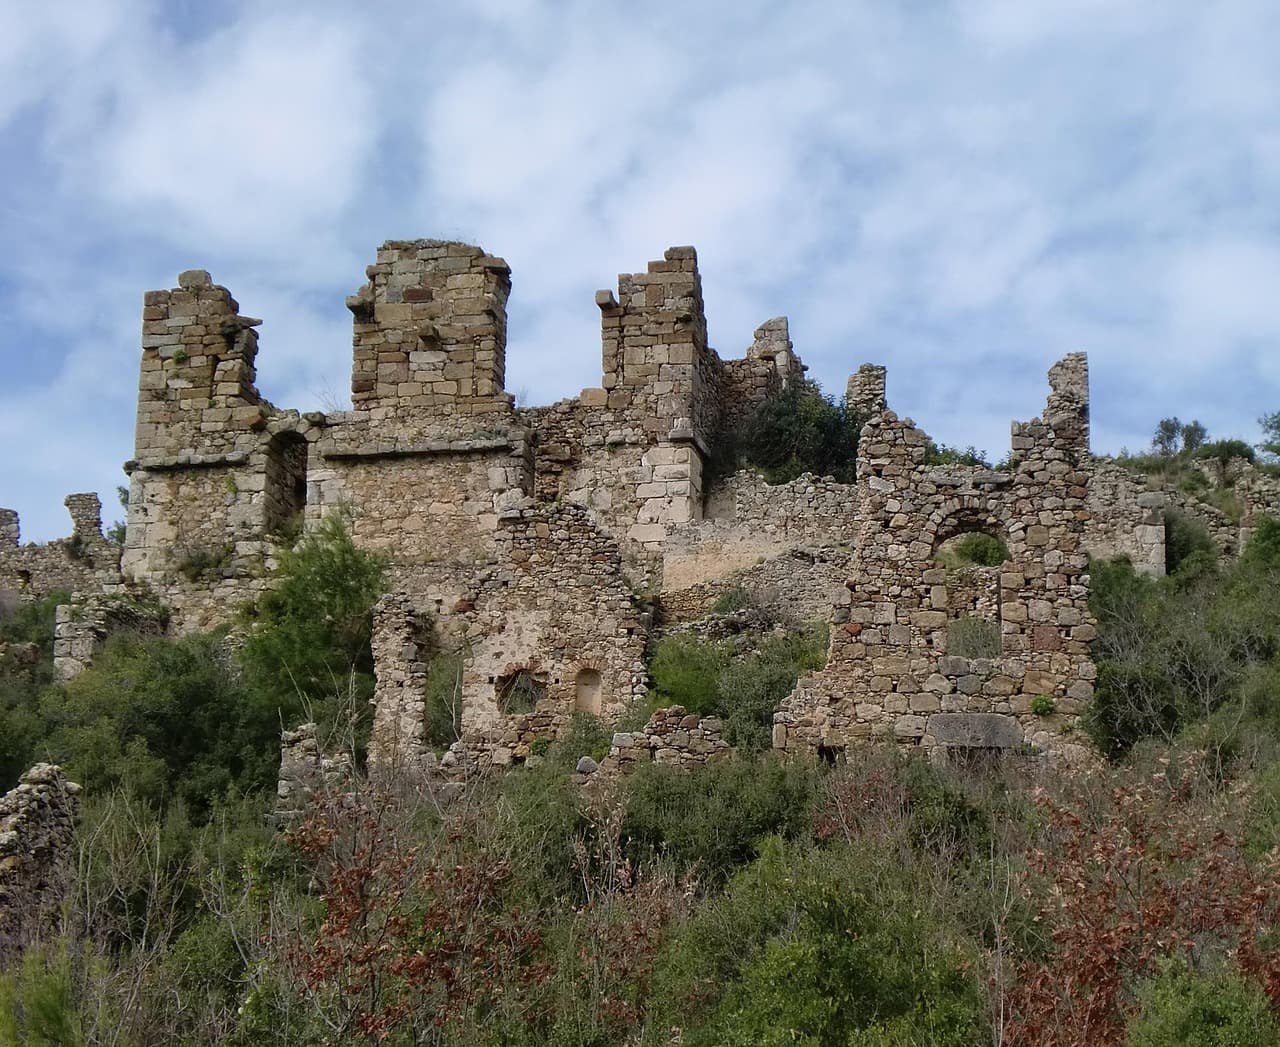
Fort Bottom Ruins · morning · 90 min · Nine Mile Canyon Rock Art Corridor

Arrive by 7:30am and the ruins are entirely yours — no other visitors, just weathered stone granaries glowing amber in early light and the distant murmur of the Green River far below. This remote site rewards the effort of reaching it with a profound sense of walking exactly where the Fremont once stood, granaries intact enough to imagine their daily life centuries ago.
Fort Bottom Ruins
Photo by fendt1 on Pixabay
Photograph the stone granaries against the canyon backdrop in the first hour of light, when shadows are long and textures are richest.
Remote, rough terrain; not recommended for limited mobility.
20 min driveA rougher stretch of road connecting the two sites — go slow, and enjoy the shifting canyon light as the sun climbs higher.
10:00 AM - 11:30 AM
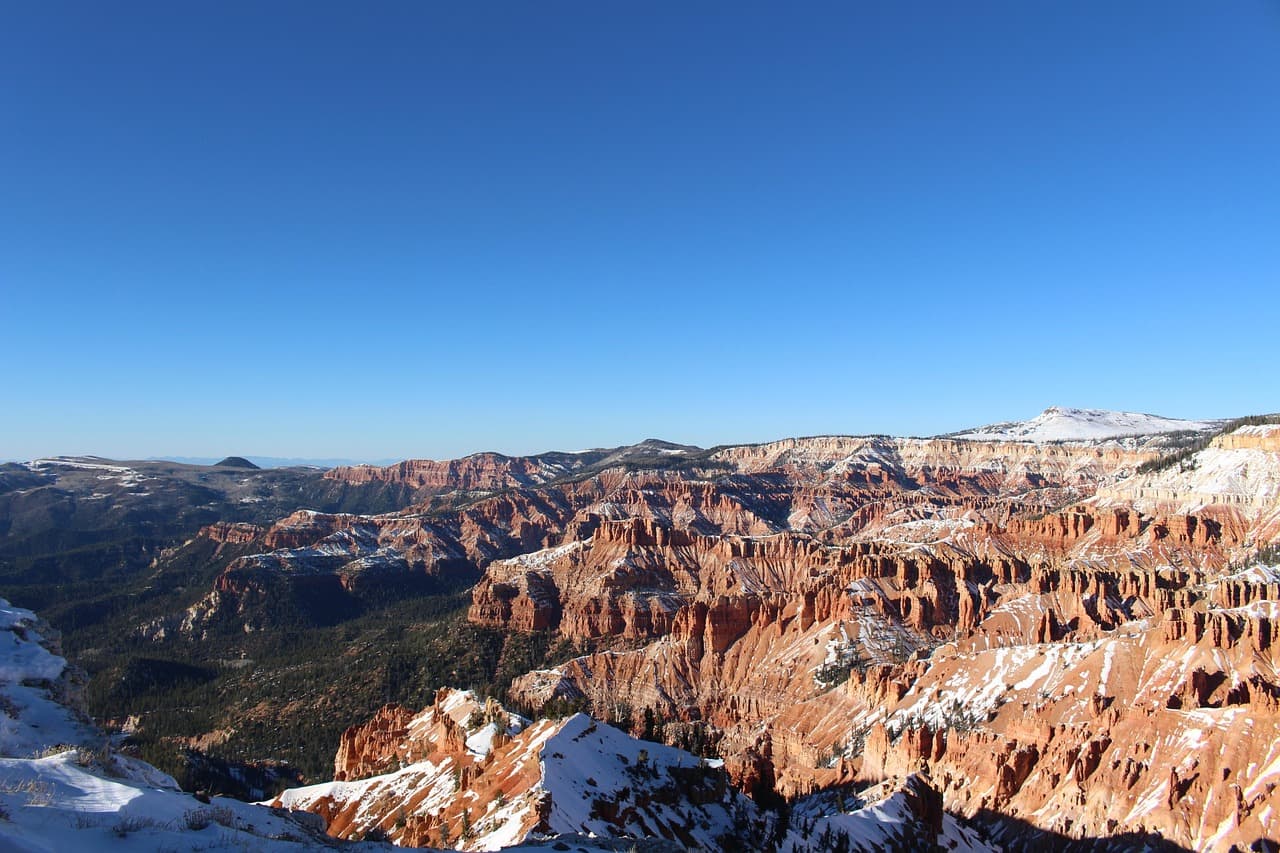
Green River Overlook Trail · midday · 90 min · Nine Mile Canyon Rock Art Corridor

A moderate hike opening onto endless canyon ridgelines and a sweeping bend of the Green River — spring wildflowers dot the trailside, adding unexpected color against the red stone. Morning foot traffic stays light; by midday you may pass a handful of other hikers, still nowhere near crowded, and the trail's highest point offers a natural spot to pause together and take in the layered canyon walls stretching to the horizon.
Green River Overlook Trail
Photo by WeTheAstronauts on Pixabay
The main overlook platform looking south toward the Green River bend is the strongest shot, especially with midday light picking out the water's curve.
Moderate trail with uneven footing; not recommended for those with mobility limitations.
30 min driveA longer transfer back toward the main corridor; consider a scenic pullover partway to stretch and take in the canyon's changing width and color.
2:00 PM - 4:00 PM
Nine Mile Canyon (rock art panels) · afternoon · 120 min · Nine Mile Canyon Rock Art Corridor

Return to the main corridor for a second pass, this time seeking out the Tavaputs Plateau overlook panels and the horse panel cluster further along the canyon — different light, different panels, and a deeper sense of the scale of this open-air gallery. The afternoon sun angles differently than your first-day visit, casting new detail across figures you may have glossed over before.

Nine Mile Canyon (rock art panels)
Euler, Robert C Green, Dee F / wikimedia (Public domain)
The horse panel cluster (mile 15–18) and Tavaputs Plateau overlook (mile 20–22) both benefit from the lower angle of afternoon light around 3–4pm.
Uneven, unpaved terrain throughout; not wheelchair accessible.
Optional detour: Rochester PanelAfter Green River Overlook Trail and before returning to the main corridor
A quick, quiet detour back to an intimate panel if you want a second, calmer look in different light. Skip if: Skip if the day already feels full — you saw this panel yesterday and repetition may dull its impact on a demanding hiking day.
If it rains: If storms roll in, abandon trail plans immediately — flash flood risk is real in this terrain — and retreat toward Price for indoor options like the town's museums and galleries until conditions clear.

The earliest light of the day belongs entirely to the two of you at Fort Bottom Ruins, stone granaries catching the first warm rays while the Green River murmurs unseen far below. It's a hushed, almost reverent start to the day, the kind of solitude that's increasingly rare and worth the early wake-up call.

The pace shifts from stillness to movement as the Green River Overlook Trail opens into sweeping views, wildflowers threading color through the red stone underfoot. By afternoon, energy redirects back into the main rock art corridor for a second, richer look at panels transformed by the day's changing light.

With no dining data available directly along the canyon, plan your evening meal back in Price or Helper — the drive back gives time to decompress and talk through the day's discoveries before settling into a relaxed, unhurried dinner in town.

Wilderness and reflection

Day 3: Cottonwood Canyon & the Long Goodbye

A moderate final day covering roughly 3 miles through Cottonwood Canyon's dramatic terrain, ending with a splurge evening in town.

Wear
Breathable layers for canyon shade-to-sun transitions, grippy footwear for uneven canyon floor, and a light jacket for the cooler evening ahead.
Budget
$100–160 for two, reflecting a splurge dinner to close out the trip.
8:00 AM - 11:00 AM
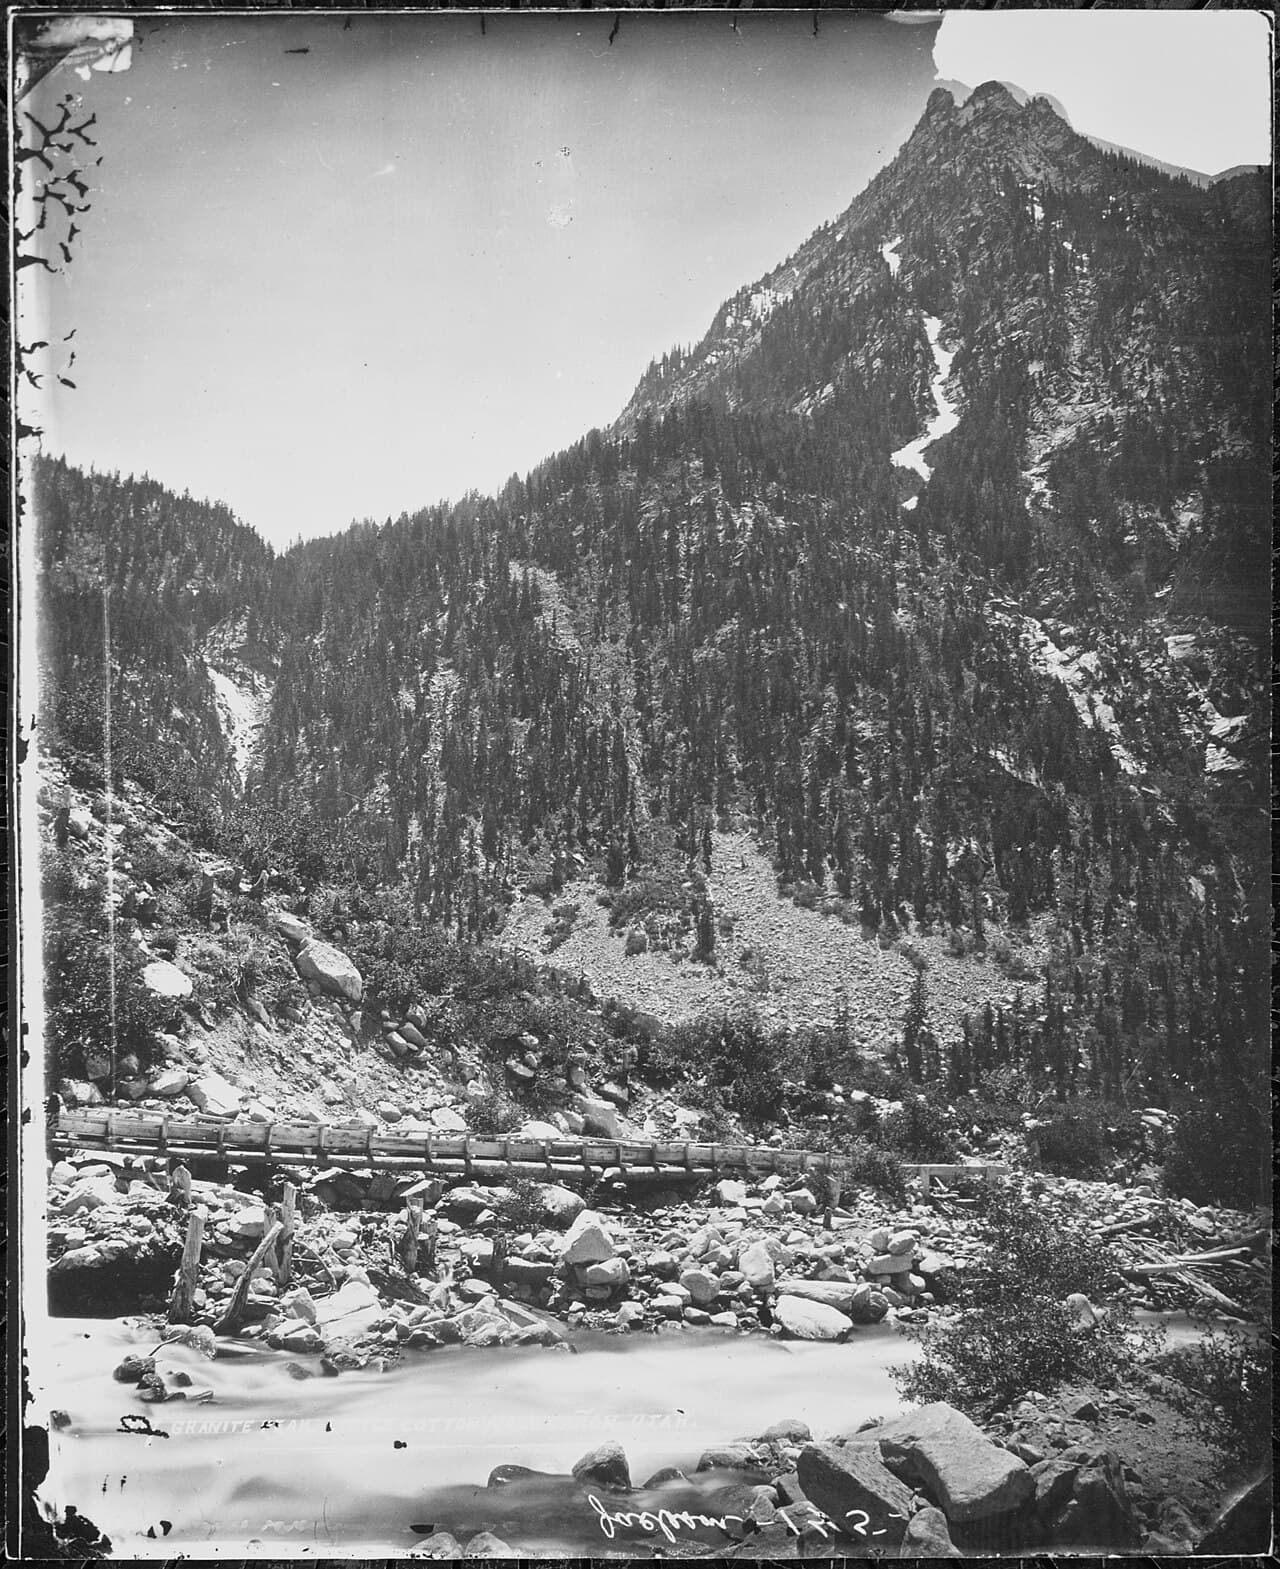
Cottonwood Canyon · morning · 180 min · Cottonwood Canyon

Arrive by 8am to claim the canyon before weekend crowds arrive — by mid-morning it draws moderate traffic, but early light filtering through the narrow opening above makes the wait worthwhile. Towering red and tan walls close in overhead, sage and juniper scenting the cool air, and the faint rush of seasonal water underfoot adds a rare sensory layer after two days of dry silence. This is the trip's most physically active stretch, but the reward is a genuine sense of wilderness solitude.

Cottonwood Canyon
William Henry Jackson / wikimedia (Public domain)
The upper canyon rim overlook, where light breaks through the narrow opening, is the standout shot — aim for mid-morning when the beam of light is most defined.
Not recommended for limited mobility; canyon floor is uneven with some scrambling required.
10 min walkA short walk deeper into the canyon, following the natural bend of the streambed — no need to backtrack to the car.
11:15 AM - 12:15 PM
Cottonwood Canyon · midday · 60 min · Cottonwood Canyon

A slower final hour within the same canyon, following the streambed bends where stone reflects in shallow pools — a quieter, more contemplative note to close out the wilderness portion of the trip. This is a good moment to simply sit together on a shaded rock and let the trip's pace finally slow all the way down.

Cottonwood Canyon
William Henry Jackson / wikimedia (Public domain)
Streambed bends with reflected stone (mile 2–2.5) work best around midday when overhead light reaches the canyon floor directly.
Same uneven terrain as morning segment; not accessible for limited mobility.
Optional detour: Fort Bottom RuinsBefore Cottonwood Canyon, if time allows an early detour
A second, quieter visit for those who want one more look at the ruins in different light before leaving the area. Skip if: Skip if travel logistics for departure day are tight — this adds significant driving time on a day better spent unwinding.
If it rains: Cottonwood Canyon carries real flash flood risk in storms — if rain threatens, skip the canyon entirely and spend the morning revisiting Price's museums or simply resting before the evening's splurge dinner.

The final full day begins in Cottonwood Canyon's cool shade, towering walls and the faint sound of seasonal water offering a different sensory texture than the dry silence of the rock art corridor. Arriving early secures near-total solitude before the canyon draws its modest midday crowd.

The day tapers gently rather than building further — a slow second hour in the same canyon, following streambed bends and reflected light, gives space to process three days of ancient stone and desert silence before heading back toward town.

Close the trip with a splurge dinner back in Price or nearby Helper — while specific venue data isn't available for this stop, plan to seek out the most upscale option town offers for the evening, ideally with a good wine list and a quiet table for two, marking a fitting final note after days spent in profound, shared quiet.

Want to tweak this trip?

Our AI planner can customize this itinerary to your exact dates, interests, and travel style.

Customize This Itinerary
Good to Know

Restaurant details (hours, menus, availability) change frequently. Check current hours before visiting, especially in seasonal destinations.

Dietary compatibility tags are general guidance. If you have severe allergies, confirm directly with the restaurant.

Travel tips are general guidance, not professional safety advice. Check government advisories for latest information.

All prices are approximate and may vary seasonally.

We use cookies to improve your experience and analyze site usage. Essential cookies are always active. You can customize your preferences or accept all cookies. Cookie Policy