3 DaysActive Retirees5 Stops

Nine Mile Canyon (near Price), Utah

3-Day Itinerary for Active Retirees

Stone Stories at Dawn: Three Days Among the Petroglyphs of Nine Mile Canyon

Stone Stories at Dawn: Three Days Among the Petroglyphs of Nine Mile Canyon

Forty miles of red rock unfold like an open book, each panel of carved stone a sentence from a conversation that began a thousand years ago. Here, the desert keeps its own hours—cool mornings for wandering, warm afternoons for resting in the shade—and the canyon rewards those who arrive early and move slowly.

At a Glance

Climate & Weather
Summer days in Nine Mile Canyon run hot and dry, often 85–95°F by early afternoon, with intense sun and little shade on the canyon floor. Mornings stay pleasant into the low 70s, so plan outdoor time before 10am. Pack a wide-brimmed hat, breathable long sleeves, sunscreen, and at least two liters of water per person daily; sturdy closed-toe shoes are essential on uneven rock.
Getting Around
A personal or rental vehicle is essential; there is no public transit into or within the canyon. A high-clearance vehicle is recommended for comfort on the gravel sections, though a standard car can manage the main road in dry summer conditions. Plan for slow, deliberate driving—20-25 mph average—with frequent pullouts for viewing.
Budget
Expect to spend roughly $40-70 per person per day on meals and modest activity costs, since the canyon itself has no entrance fees or services—most spending happens in Price before and after canyon visits.
Safety
The canyon road is remote with spotty-to-nonexistent cell service, so let someone know your plans and carry extra water, snacks, and a paper map. Flash flood risk rises with summer afternoon thunderstorms, so avoid narrow canyon sections if storms are forecast. Fill up on fuel and supplies in Price before entering the canyon, and never touch or climb on rock art panels.
Connectivity
Cell service is unreliable to nonexistent throughout most of the canyon; download offline maps and directions before departing Price. Wifi is available at lodging in Price and Helper but should not be relied upon once you're on the canyon road.
Local Tips
Start each canyon day by 7:30-8am to enjoy cool air and soft light before the heat and any midday traffic arrive. Fuel up and pack a full cooler in Price the night before, since there are no services once you enter the canyon. Ask locally about recent road conditions, as summer storms can temporarily wash out sections.

Highlights

  • Sunrise light on the Fremont petroglyphs before the heat arrives
  • Tracing ancient handprints at the Rochester Panel in late afternoon glow
  • A moderate, shaded walk to sweeping Green River overlooks
  • Quiet canyon mornings with almost no other visitors
  • Deep cultural immersion in 'the world's longest art gallery'
  • Comfortable, unhurried pacing built around shade and rest stops
  • Small-town Price hospitality bookending each canyon day

Day-by-Day Plan

Orientation and gentle introduction

Day 1: Arrival and First Light on the Canyon Floor

A light first day easing into the canyon's rhythm with one primary stop and generous rest time, covering under 1 mile of walking total.

Wear
Breathable long-sleeve shirt, wide-brimmed hat, closed-toe walking shoes, and sunscreen; bring a light jacket for the cool early morning drive.
Budget
$45-60 per person for meals and fuel
8:00 AM - 10:30 AM
Nine Mile Canyon (rock art panels) · morning · 150 min · Nine Mile Canyon Rock Art Corridor

The canyon opens slowly, its walls rising in bands of rust and tan as the road winds deeper toward the panels near the canyon mouth. Arrive by 8am and the light is still soft and low, throwing the carved figures into gentle relief before the sun climbs and flattens the detail. This is a day for looking, not hurrying—settle into a folding chair near the Canyon mouth approach panels and let your eyes adjust to spotting the faint spirals and human forms against the stone.

Nine Mile Canyon (rock art panels)
Euler, Robert C Green, Dee F / wikimedia (Public domain)
Photograph the canyon mouth approach panels just after sunrise, when raking light brings out carved detail that disappears by midday.
Terrain is uneven and unpaved; benches are not available, so bring a portable stool or chair if standing for extended periods is difficult.
If it rains: If rain moves in, postpone the canyon drive and instead spend the morning at one of Price's dinosaur museums or local galleries, which offer indoor cultural depth without weather risk.

The drive south from Price unspools gradually, pavement giving way to graded dirt as the canyon walls begin to close in overhead. By the time you reach the first rock art panels near the canyon mouth, the morning air is still cool and the light is doing its best work—soft, angled, and forgiving on the eyes. This is an easy introduction: no rush, no itinerary pressure, just the quiet business of noticing centuries-old handprints and spiral motifs etched into red stone.

With the sun climbing and the heat beginning to press down on the canyon floor, the afternoon is intentionally unstructured—a good time to retreat toward Price, rehydrate, and rest in air conditioning before the evening cools things down again. This buffer day is designed to let your body adjust to the elevation, the dry air, and the slower canyon pace without overextending on day one.

As the light softens back into gold, take a slow evening in Price itself, settling into the rhythm of small-town hours and letting the first day's canyon impressions settle. There's no rush to fill the evening with more activity; a quiet dinner and an early night set you up well for two fuller days ahead.

Cultural immersion and panel-hopping

Day 2: Deep Time on the Canyon Walls

A moderately paced day visiting two rock art sites within the same cluster, with roughly 1.5 miles of gentle walking spread across the morning and afternoon.

Wear
Lightweight long sleeves, brimmed hat, sturdy walking shoes with good tread, and layered clothing for temperature shifts between shaded and sunlit canyon sections.
Budget
$50-70 per person for meals, fuel, and incidentals
25 min driveA slow, scenic drive along the canyon floor road, red walls rising steadily on both sides as the morning light deepens.
8:00 AM - 9:15 AM
Rochester Panel · morning · 75 min · Nine Mile Canyon Rock Art Corridor

Arrive early and the Rochester Panel feels almost private—warm red sandstone catching the first direct sun, ancient hand-carved grooves visible in sharp relief before the heat sets in. This panel rewards patience: take time tracing the anthropomorphic figures with your eyes, noting how the artists used the natural curve of the stone. By late morning, small groups of archaeology enthusiasts tend to arrive, so an 8am visit keeps the silence intact.

Rochester Panel
Photo by Alex Moliski on Pexels
Late-afternoon light is technically better for this panel, but an early morning visit trades some photographic drama for solitude and cooler temperatures—well worth it for comfort.
The accessibility-focused time allocation suggests 15-25 minutes is manageable even with limited mobility; the path is uneven but short enough for most visitors to navigate slowly with assistance.
20 min driveA short hop further along the canyon road, windows down to catch the dry scent of sage drifting in from the roadside.
10:00 AM - 10:45 AM
Pregnant Sheep Panel · midday · 45 min · Nine Mile Canyon Rock Art Corridor

A short, unhurried stop at a panel whose carved figures have drawn quiet fascination for generations of visitors. The canyon walls tower close here, offering brief patches of shade that make this a comfortable midday pause before the sun reaches its peak. Trace the outlines with your eyes only—these carvings are irreplaceable, and even a light touch can accelerate their fading.
Pregnant Sheep Panel
Marshall, F. R. Spencer, D. A. Millin, R. B. / wikimedia (Public domain)
If you're passing through again near sunset, the canyon mouth at that hour backlights the walls beautifully—but a midday visit here is more about presence than photography.
Not recommended for visitors with significant mobility limitations; footing is uneven and there are no benches or paved surfaces.
Optional detour: Fort Bottom RuinsAfter Pregnant Sheep Panel and before returning to Price
A remote, evocative stop with stone granaries overlooking the Green River, ideal for those craving deeper historical texture and willing to accept a longer, rougher drive. Skip if: The access road is rough and the site sees very few visitors for good reason—those preferring easier terrain and shorter driving days should skip this in favor of resting before tomorrow's hike.
If it rains: If afternoon thunderstorms roll in, retreat from the canyon floor immediately, as flash flooding is a real risk here; head back toward Price and consider visiting indoor cultural sites there instead.

The morning begins with an easy drive deeper into the canyon toward the Rochester Panel, the road quiet and the light still gentle enough to bring out every carved detail on the sandstone. From there, a short further drive leads to the Pregnant Sheep Panel, where the canyon narrows and offers welcome shade just as the sun starts to climb. Both stops emphasize looking rather than hiking, ideal for a day built around cultural depth rather than physical exertion.

By early afternoon, the heat asserts itself fully, and the wise move is to retreat from the canyon floor back toward Price for a leisurely lunch and some air-conditioned downtime. This is a good afternoon to review photos, read up on Fremont and Ute history, or simply rest before an early dinner—the canyon's intensity is best absorbed in measured doses.

Evening settles back into Price's comfortable small-town pace, with time for an unhurried dinner and an early turn-in ahead of tomorrow's slightly more active day at Cottonwood Canyon.

Scenic overlook and quiet wonder

Day 3: Wide Views and Canyon Walls

A relaxed final day featuring one moderate walk within Cottonwood Canyon, totaling under 2 miles with ample rest breaks in shaded sections.

Wear
Breathable layers, a hat with good coverage, trail-ready shoes with ankle support, and a light rain shell in case of afternoon storms.
Budget
$50-65 per person for meals, fuel, and incidentals
40 min driveA longer drive connecting the two clusters, canyon walls gradually giving way to a different, more dramatic rock formation as you approach Cottonwood.
7:45 AM - 10:15 AM
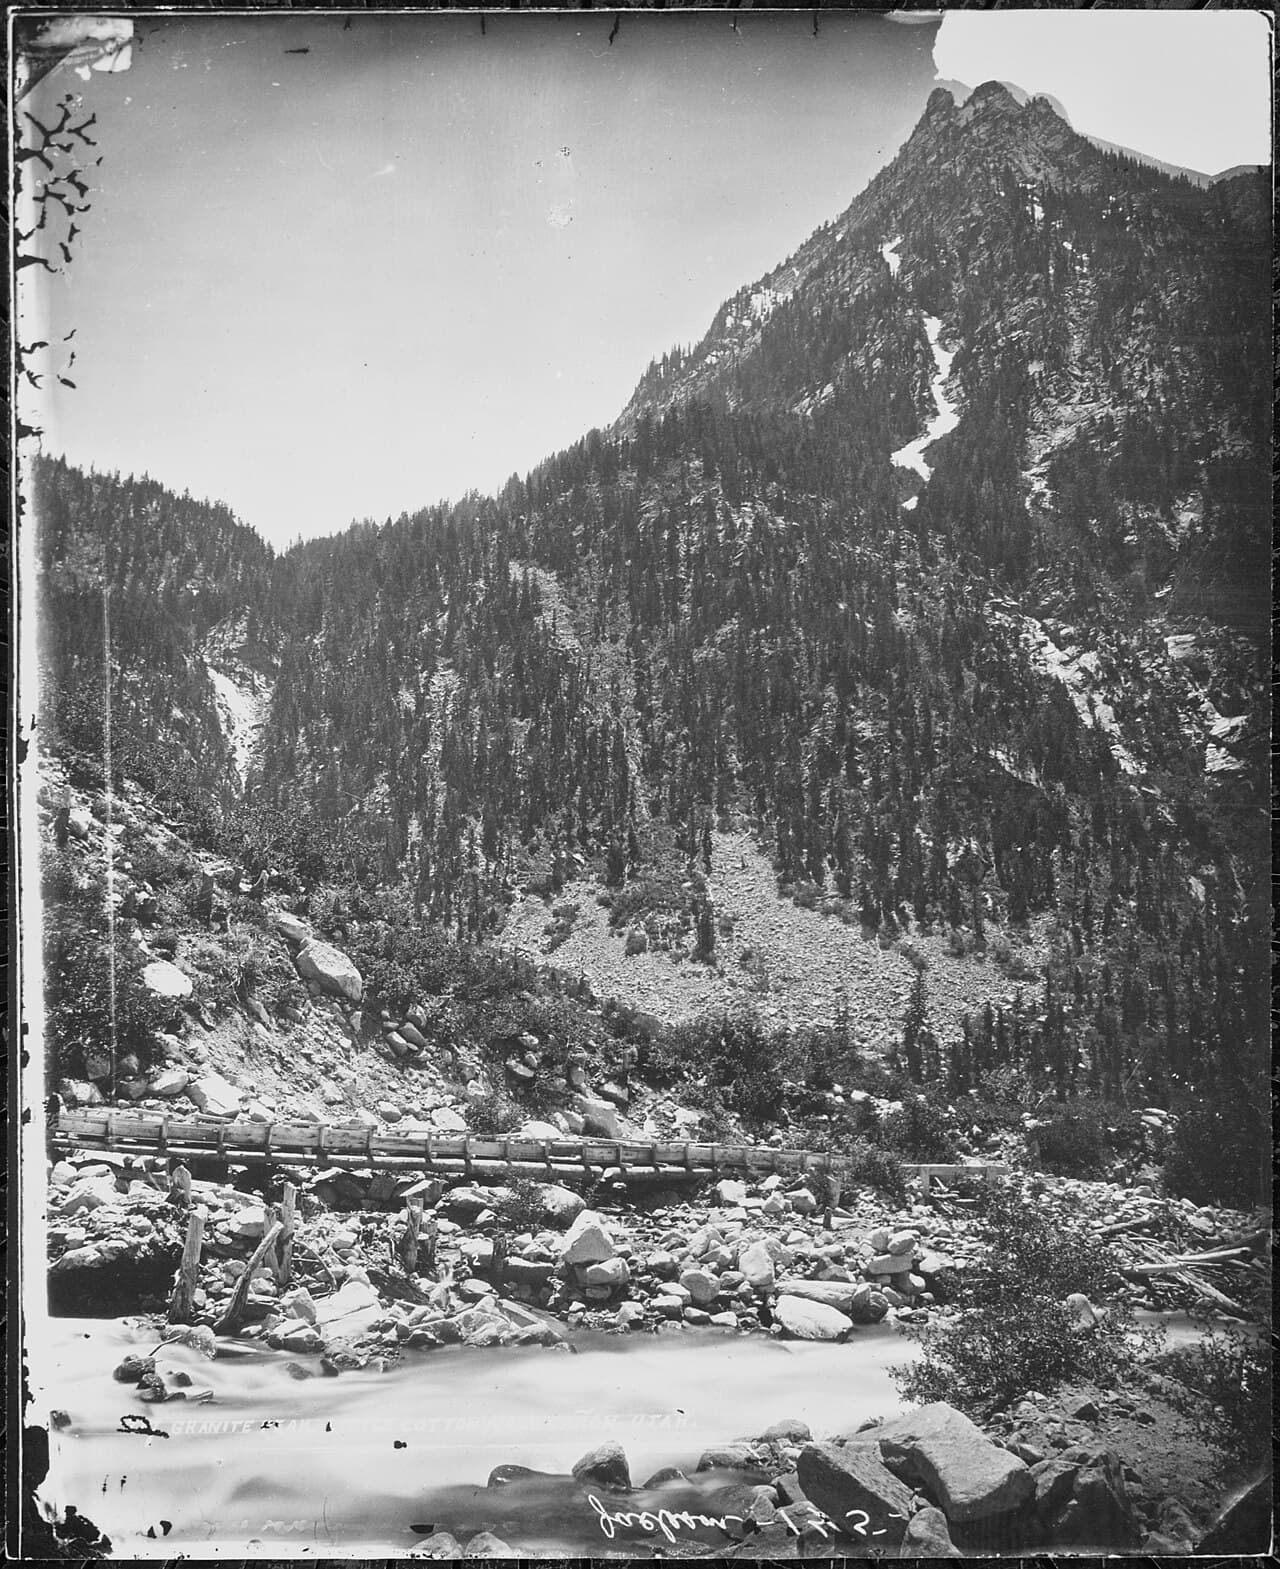
Cottonwood Canyon · morning · 150 min · Cottonwood Canyon

Arrive by 7:45am and the canyon is nearly yours alone—cool shade still pooling along the canyon floor, red and tan walls rising overhead, and the faint sound of seasonal water somewhere below. This is the most physically engaging stop of the trip, so take it at an unhurried pace, pausing often in the natural shade where the canyon narrows. By mid-morning, weekend crowds begin to appear, so an early start preserves both the solitude and the cooler temperatures.

Cottonwood Canyon
William Henry Jackson / wikimedia (Public domain)
The upper canyon rim overlook, where light breaks through a narrow opening, is best photographed in the first hour after sunrise for dramatic shadow contrast.
Not recommended for visitors with significant mobility limitations; the terrain is uneven and there are no benches, though the casual pace allows frequent self-timed rest stops.
Optional detour: Green River Overlook TrailBefore Cottonwood Canyon, as an alternative morning start
Offers sweeping desert vistas and a moderate hike with strong photo opportunities at the main overlook platform, a good substitute if Cottonwood Canyon feels too strenuous. Skip if: The elevation change and uneven trail surface make it less comfortable than Cottonwood Canyon for those preferring gentler terrain, and it adds significant driving time to reach.
If it rains: Cottonwood Canyon carries real flash flood risk during storms, so if rain or thunderstorms are forecast, skip the canyon entirely and spend the morning instead revisiting favorite rock art panels from Day 2 via the main canyon road, which is comparatively safer.

The final morning brings a somewhat longer drive to Cottonwood Canyon, where towering red and tan walls create a cooler, shadier environment than the open rock art corridor. Moving slowly through the canyon floor, pausing at natural shaded alcoves, this is a satisfying and gently active close to the trip—engaging enough to feel like an accomplishment, gentle enough to remain comfortable.

By midday, retreat from the canyon ahead of both the heat and any weekend crowds, heading back toward Price for a relaxed lunch and time to reflect on three days of ancient stories written in stone. The afternoon is intentionally unscheduled, allowing for packing, rest, or a final stroll through Price before departure logistics take over.

A final, easy evening in Price closes the trip on a quiet note—no late nights, no rush, just the lingering impression of red canyon walls and centuries-old carvings that will likely follow you home long after the drive back to Salt Lake City.

Want to tweak this trip?

Our AI planner can customize this itinerary to your exact dates, interests, and travel style.

Customize This Itinerary
Good to Know

Restaurant details (hours, menus, availability) change frequently. Check current hours before visiting, especially in seasonal destinations.

Dietary compatibility tags are general guidance. If you have severe allergies, confirm directly with the restaurant.

Travel tips are general guidance, not professional safety advice. Check government advisories for latest information.

All prices are approximate and may vary seasonally.

We use cookies to improve your experience and analyze site usage. Essential cookies are always active. You can customize your preferences or accept all cookies. Cookie Policy