3 DaysSolo Traveler9 Stops

Nine Mile Canyon (near Price), Utah

3-Day Itinerary for Solo Traveler

โ€œStone Voices: Three Days Alone in Nine Mile Canyonโ€

Stone Voices: Three Days Alone in Nine Mile Canyon

Forty miles of red rock unfold like a scroll here, every panel of stone a message left by hands centuries gone. This is a place that rewards patience and solitude โ€” the kind of canyon where your own footsteps are the loudest sound for hours at a time.

At a Glance

Climate & Weather
Summer days run hot and dry, often 85โ€“95ยฐF on the canyon floor with intense sun and almost no shade; nights cool considerably. Pack a wide-brim hat, sun shirt, high-SPF sunscreen, at least 2โ€“3 liters of water per person per day, and sturdy hiking boots for uneven, rocky terrain. Afternoon thunderstorms can build quickly in summer โ€” watch the sky.
Getting Around
A personal vehicle is the only way to explore Nine Mile Canyon โ€” there's no public transit, rideshare, or shuttle service. High-clearance is recommended, especially for spur roads to Fort Bottom Ruins and Cottonwood Canyon. Plan your driving day around fuel and daylight; the full canyon road takes 2โ€“3 hours one-way at a relaxed pace with stops.
Budget
Expect to spend roughly $40โ€“70/day on food and incidentals as a solo traveler โ€” meals in Price/Helper run $10โ€“25, plus fuel costs for the canyon drive and any park/site fees. No dining or services exist within the canyon itself, so budget for meals bookending your canyon days.
Safety
Traveling solo here means self-reliance is non-negotiable: tell someone your route and expected return time before entering the canyon, carry a paper map since cell service is spotty to nonexistent, and keep your fuel tank topped off before leaving Price. Flash flood risk is real during summer storms โ€” never enter narrow canyon sections like Cottonwood Canyon if rain is forecast. The remoteness that makes this canyon magical also means help is far away, so a high-clearance vehicle, extra water, and a full tank are essential, not optional.
Connectivity
Cell coverage is unreliable to absent throughout most of the canyon โ€” download offline maps before you leave Price, and treat a physical map or GPS device as essential gear. Price and Helper have normal cell and WiFi service.
Local Tips
Start every canyon day at first light โ€” not just for the cooler temperatures, but because the low-angle sun makes the petroglyphs dramatically easier to see and photograph. Fill your tank and grab supplies in Price the night before or early morning, since nothing is available once you're in the canyon. Solo travelers often find informal conversation with fellow rock art enthusiasts at the more accessible panels near the canyon mouth โ€” a nod of shared appreciation for the silence goes a long way out here.

Highlights

  • Trace Fremont and Ute petroglyphs at golden hour with no one else around
  • Stand alone at Fort Bottom Ruins above the Green River
  • Hike the Green River Overlook Trail as morning light hits the Book Cliffs
  • Study the Rochester Panel's carved figures in warm afternoon light
  • Explore Cottonwood Canyon's narrow, shaded walls at your own pace
  • Fuel up and refuel your spirit in quirky, artsy Helper before heading back into the wild

Day-by-Day Plan

Orientation, gentle exploration

Day 1: Arrival & First Light on the Canyon Floor

A lighter first day easing into the canyon's rhythm with the accessible rock art corridor near the canyon mouth, roughly 2 miles of easy walking total.

Wear
Lightweight long sleeves and pants for sun protection, broad-brim hat, sturdy walking shoes, and a daypack with at least 3 liters of water.
Budget
$45โ€“60 (fuel, snacks, one sit-down meal in Price)
7:30 AM - 9:30 AM
Nine Mile Canyon (rock art panels) ยท morning ยท 120 min ยท Nine Mile Canyon Rock Art Corridor

Arrive at the canyon mouth by 7:30am and the light is still low and gold, raking sideways across the rock walls to throw every carved figure into sharp relief. The silence out here is a physical thing โ€” just wind moving through sagebrush and the occasional raven overhead. This is the gentlest introduction to the canyon's scale, and a solo traveler can move at whatever pace curiosity demands, lingering at panels that speak to them.

Nine Mile Canyon (rock art panels)
Euler, Robert C Green, Dee F / wikimedia (Public domain)
Shoot the canyon mouth approach (mile 8โ€“10) just after sunrise for long shadows and warm backlighting on the walls.
Uneven, unpaved terrain throughout; not wheelchair accessible.
20 min drive โ€” A slow crawl deeper into the canyon, red walls closing in a little tighter with every mile.
10:00 AM - 10:45 AM
Pregnant Sheep Panel ยท midday ยท 45 min ยท Nine Mile Canyon Rock Art Corridor

A short, contemplative stop at one of the canyon's most intimate panels โ€” the carved figure feels almost private, tucked into a quiet bend where few visitors linger long. Trace the erosion patterns with your eyes, not your hands, and notice how differently the panel reads now compared to the raking light you saw an hour ago.
Pregnant Sheep Panel
Marshall, F. R. Spencer, D. A. Millin, R. B. / wikimedia (Public domain)
Face the panel directly at mid-distance to capture both detail and scale without harsh midday glare.
Loose rock and uneven ground; no benches or shade.
Optional detour: Rochester Panel โ€” After Pregnant Sheep Panel and before returning to Price
A quieter, more intimate panel that rewards a slower look, especially if you're not yet tired of studying rock art up close. Skip if: If you're already feeling saturated with petroglyph viewing on day one, save this less crowded panel for Day 2's afternoon when the light is better anyway.
If it rains: If storms roll in, skip the canyon drive entirely and spend the day in Price exploring its dinosaur museums and local galleries instead โ€” the canyon road turns hazardous fast when wet.

The canyon greets you gently on day one โ€” low light, cool air, and an almost eerie quiet as you ease into the rock art corridor near the canyon mouth. There's no rush here; this is a day for finding your footing, literally and figuratively, on uneven ground that rewards careful attention rather than fast mileage.

By midday the heat builds, so the pace naturally slows to match it. A short visit to the Pregnant Sheep Panel closes out the canyon portion of the day before the drive back toward Price, giving you time to rest before evening.

Head back into Price by late afternoon to settle in, refuel the vehicle, and stock up on water and snacks for the days ahead. Take the evening easy โ€” a solo traveler's first night here is best spent resting up for two longer, more physically demanding days in the canyon.

Remote exploration, moderate hiking

Day 2: Deep Canyon: Ruins, Rivers, and Ridgelines

A full day covering roughly 4โ€“5 miles of moderate hiking across Fort Bottom Ruins and the Green River Overlook Trail, both physically engaging but manageable solo.

Wear
Breathable hiking layers, brimmed hat, gaiters or long pants for brush, and hiking boots with good ankle support for uneven trail sections.
Budget
$40โ€“55 (fuel, packed lunch supplies, dinner in Price or Helper)
7:00 AM - 8:30 AM
Fort Bottom Ruins ยท morning ยท 90 min ยท Nine Mile Canyon Rock Art Corridor

Arrive early โ€” by 7am if you can manage it โ€” because this remote site sees almost no visitors even in peak season, and the morning light on the stone granaries turns them amber and rust against a deep blue sky. Walking among the ruins alone, with only wind and the distant murmur of the Green River far below for company, is the kind of solitude few destinations still offer. Move carefully; the terrain is rough and there's no cushion for injury out here.
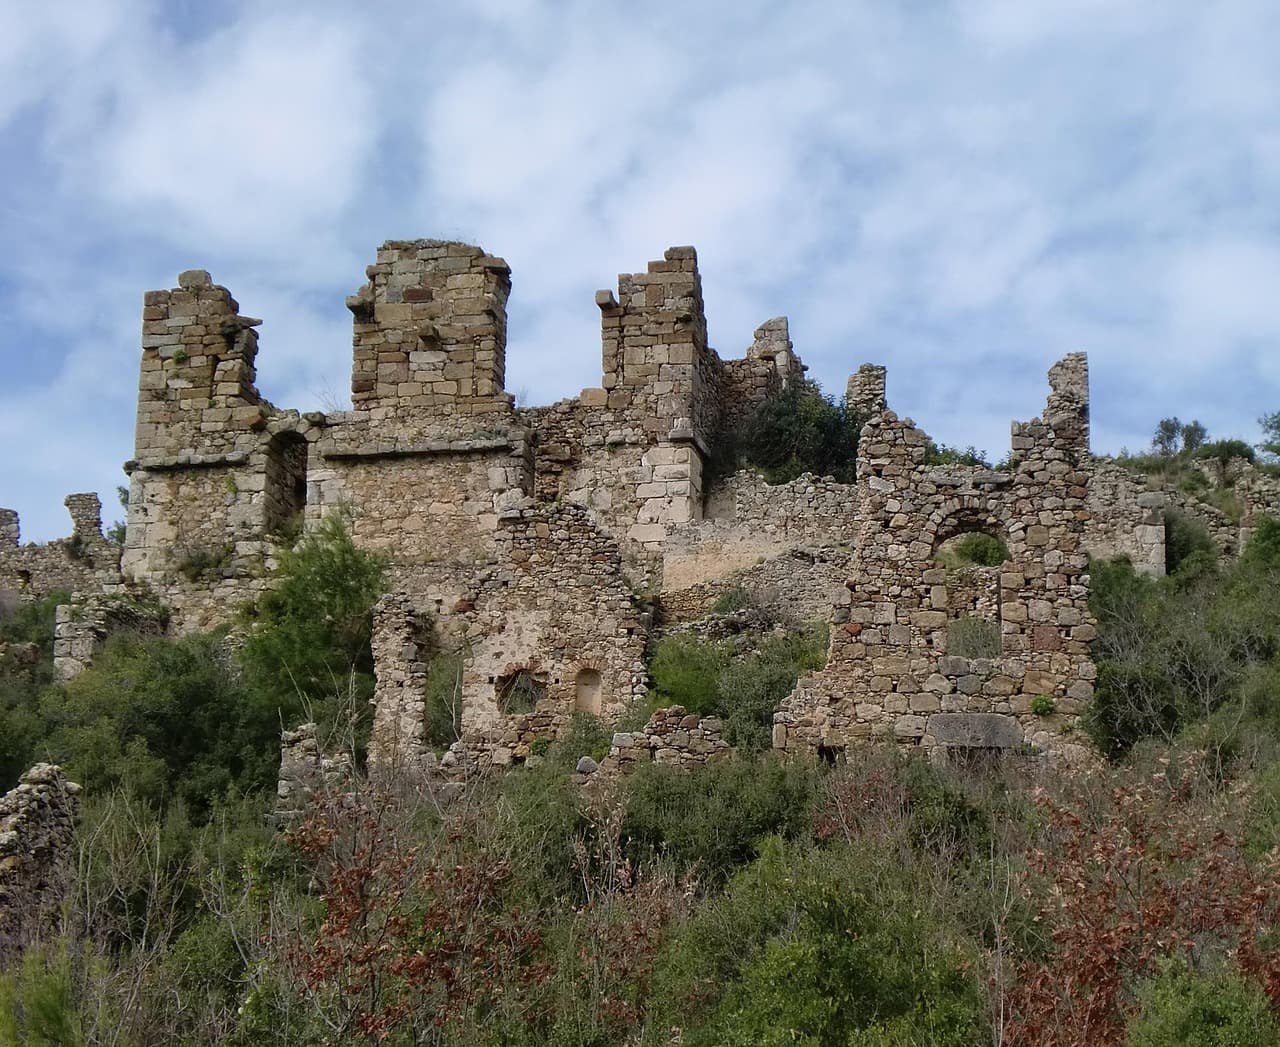
Fort Bottom Ruins
Photo by fendt1 on Pixabay
Photograph the stone granaries against the canyon backdrop in the first hour of light, before the sun climbs and flattens the contrast.
Rough, unmaintained terrain; not recommended for those with mobility limitations.
30 min drive โ€” A rougher stretch of canyon road โ€” grip the wheel a little tighter and enjoy the views that open up around each bend.
9:15 AM - 10:45 AM
Green River Overlook Trail ยท midday ยท 90 min ยท Nine Mile Canyon Rock Art Corridor

A moderate hike that trades ruins for wide-open vistas โ€” desert heat on your skin, the scrape of juniper underfoot, and canyon ridges stretching to the horizon in every direction. Mid-morning traffic picks up here, but it's rarely more than a handful of fellow hikers, and the overlook platform is a natural spot to strike up a quiet conversation with another solo traveler if the mood strikes.
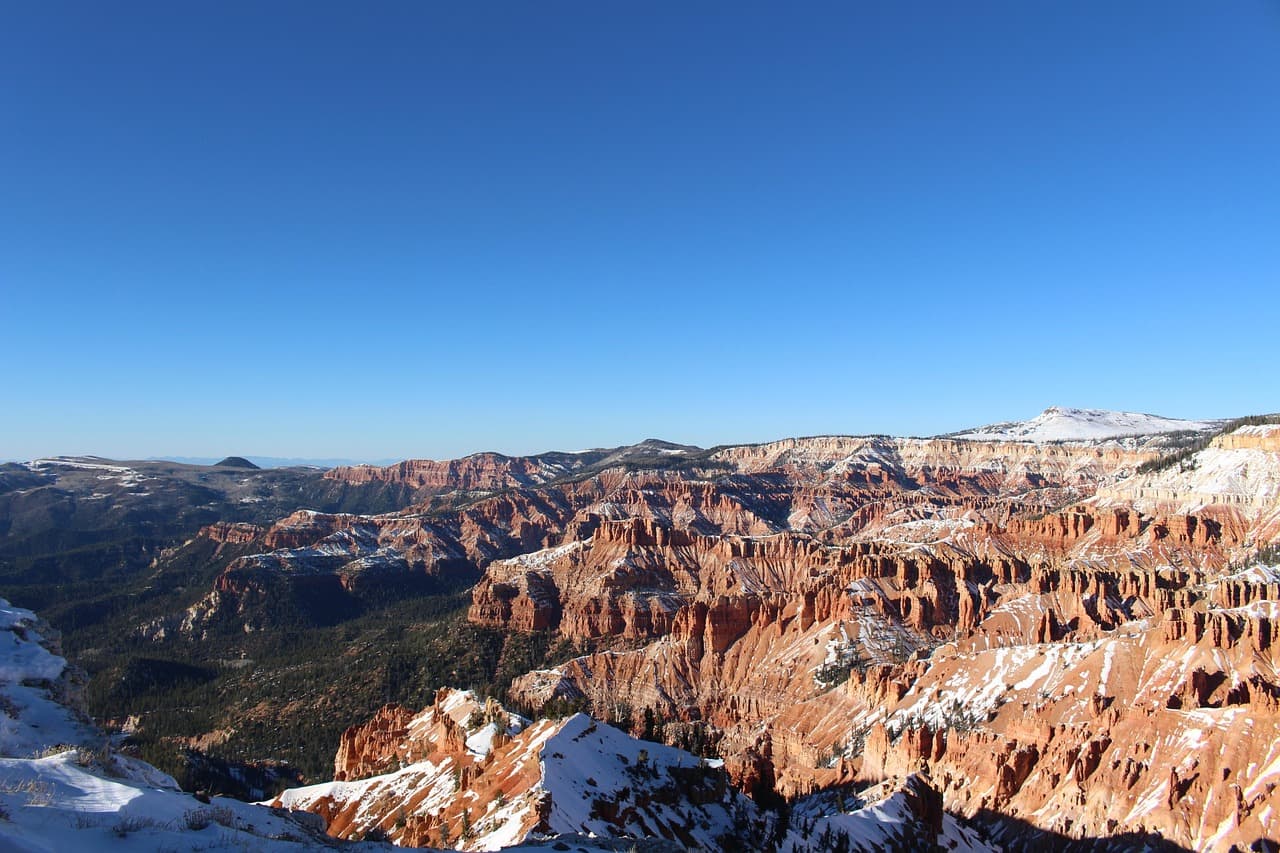
Green River Overlook Trail
Photo by WeTheAstronauts on Pixabay
The main overlook platform looking south toward the Green River bend is best photographed late morning before haze builds.
Trail is uneven and unshaded; not wheelchair accessible.
40 min drive โ€” Backtracking through the canyon as the light shifts from harsh midday white to warm gold.
3:30 PM - 4:15 PM
Rochester Panel ยท afternoon ยท 45 min ยท Nine Mile Canyon Rock Art Corridor

Return to easier ground for the day's final stop, timed for late-afternoon light that catches the carved grooves at a low angle and brings the ancient figures into sharp relief. This panel rewards patience โ€” sit with it a while, and the details reveal themselves slowly, from anthropomorphic figures to smaller symbols easy to miss on a rushed pass.

Rochester Panel
Photo by Alex Moliski on Pexels
Late-afternoon light on the panel face is ideal โ€” aim for the hour before sunset for maximum texture and shadow definition.
Uneven canyon floor; allow extra time if mobility is limited.
Optional detour: Nine Mile Canyon (rock art panels) โ€” Between Green River Overlook Trail and Rochester Panel
If time and energy allow, a return pass through the main rock art corridor at different light than Day 1 offers a genuinely different visual experience. Skip if: After a long morning of hiking and ruins, most solo travelers will want the lighter Rochester Panel stop instead of another full corridor pass.
If it rains: Afternoon thunderstorms are common in summer โ€” if the sky turns, abandon the Green River Overlook Trail hike immediately (flash flood and lightning risk on exposed ridgelines) and retreat toward Price for indoor attractions instead.

Day two starts before the heat does, with an early solo pilgrimage to Fort Bottom Ruins โ€” a site so remote and quiet it feels like discovering something no one else has found. The stone granaries glow in first light, and the only sounds are wind and the far-off river.

The pace shifts from historical stillness to physical movement on the Green River Overlook Trail, where sweeping desert views replace intimate ruins. By early afternoon, retreat from the sun's peak intensity โ€” this is the natural lull to rest, hydrate, and let the heat pass before the final stop.

Rochester Panel closes the day gently, its carved figures glowing in late light. From here, head back toward Price or push on to Helper for dinner โ€” either town offers a chance to unwind among locals after a physically full day alone in the canyon.

Wilderness immersion, departure

Day 3: Cottonwood Canyon and the Long Way Home

A shorter final day focused entirely on Cottonwood Canyon's dramatic scenery, roughly 3 miles of hiking, before heading back toward Price for departure.

Wear
Quick-dry hiking clothes, sturdy boots for streambed crossings, sun hat, and a layer for shaded canyon sections that stay cool.
Budget
$35โ€“50 (fuel, lunch, farewell dinner in Helper or Price)
7:30 AM - 10:30 AM
Cottonwood Canyon ยท morning ยท 180 min ยท Cottonwood Canyon

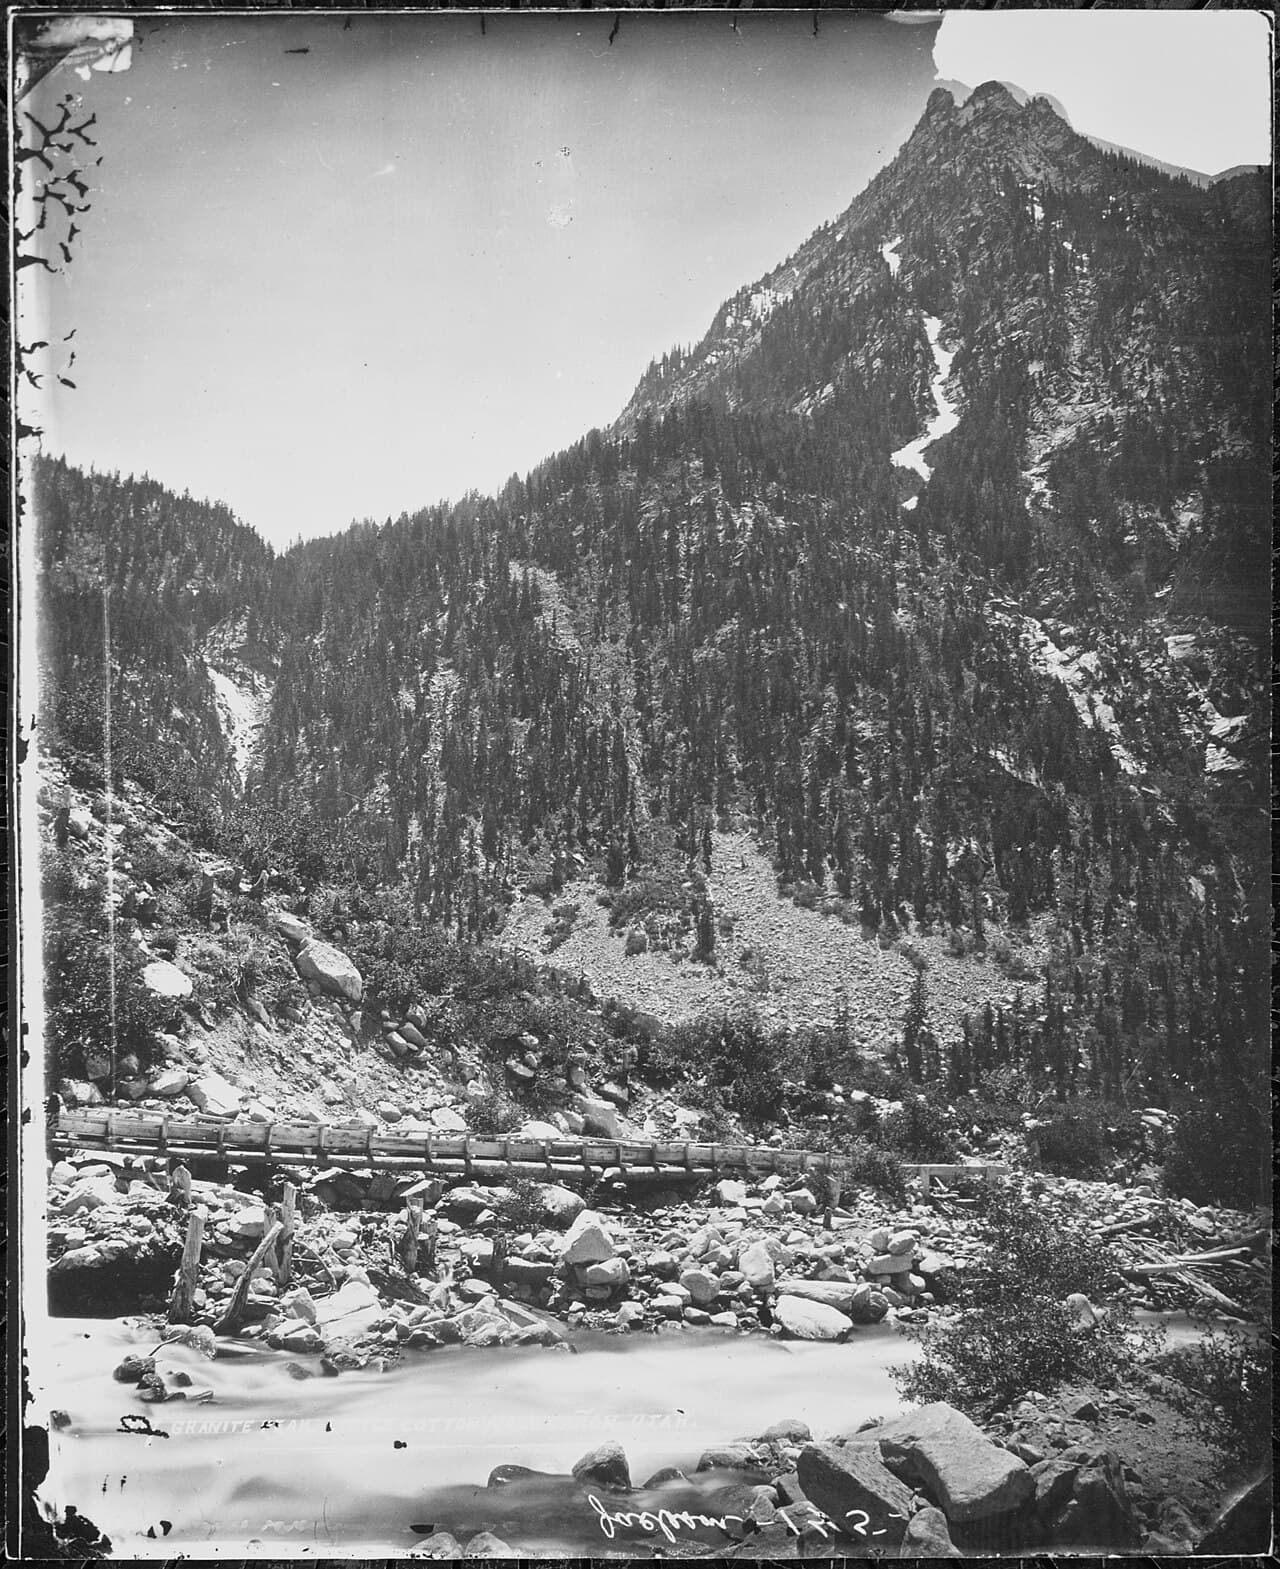
Arrive by 7:30am and you'll likely have this narrow, high-walled canyon to yourself before weekend crowds and summer heat arrive โ€” by mid-morning it can fill with day hikers. Red and tan stone rises overhead, cool shade settling across your shoulders as the walls narrow, with the faint sound of seasonal water somewhere below. This is the most physically demanding stop of the trip, and also the most rewarding for a solo traveler seeking real solitude in dramatic terrain.

Cottonwood Canyon
William Henry Jackson / wikimedia (Public domain)
The upper canyon rim overlook, where light breaks through the narrow opening, is best photographed mid-morning when the sun angle creates dramatic beams.
Rugged, narrow terrain with uneven footing; not recommended for those with mobility limitations.
Optional detour: Nine Mile Canyon (rock art panels) โ€” After Cottonwood Canyon and before departure
If you have extra time before your drive out, one last pass through the rock art corridor offers a quieter farewell to the canyon's core attraction. Skip if: If you're tired from three days of hiking or need to make good time back to Salt Lake City, it's fine to skip and head straight out.
If it rains: Cottonwood Canyon carries real flash flood risk in sudden storms โ€” if rain or thunderstorms are forecast, skip the canyon entirely and instead spend the morning in Helper's small galleries and shops before departure.

The final full day belongs entirely to Cottonwood Canyon, a high-energy scenic zone that rewards early arrival with cool shaded walls and near-total solitude. It's the most physically demanding stretch of the trip, but also the most cinematic โ€” towering red stone, seasonal water sounds, and long stretches where you won't see another person.

With the canyon explored, the afternoon shifts toward departure logistics โ€” refueling, grabbing supplies, and beginning the drive back toward Price or on to Salt Lake City. This is a natural moment to slow down and let the trip's solitude settle in before returning to noise and crowds.

Close the trip with a relaxed dinner in Helper or Price, giving yourself a chance to reflect on three days spent largely alone with some of the oldest human art in North America โ€” a quiet, grounding way to end a solo journey through deep frontier country.

Want to tweak this trip?

Our AI planner can customize this itinerary to your exact dates, interests, and travel style.

Customize This Itinerary
Good to Know

Restaurant details (hours, menus, availability) change frequently. Check current hours before visiting, especially in seasonal destinations.

Dietary compatibility tags are general guidance. If you have severe allergies, confirm directly with the restaurant.

Travel tips are general guidance, not professional safety advice. Check government advisories for latest information.

All prices are approximate and may vary seasonally.

We use cookies to improve your experience and analyze site usage. Essential cookies are always active. You can customize your preferences or accept all cookies. Cookie Policy